Config Creation/Updation
How to add columns
- User can add the columns to the Config project by configuring the When and Then Entities with required data types, which would dynamically form the column names in the project.
- User can also mark the field as required by checking the "Required" checkbox for both When and Then Entities.
How to create a Rule
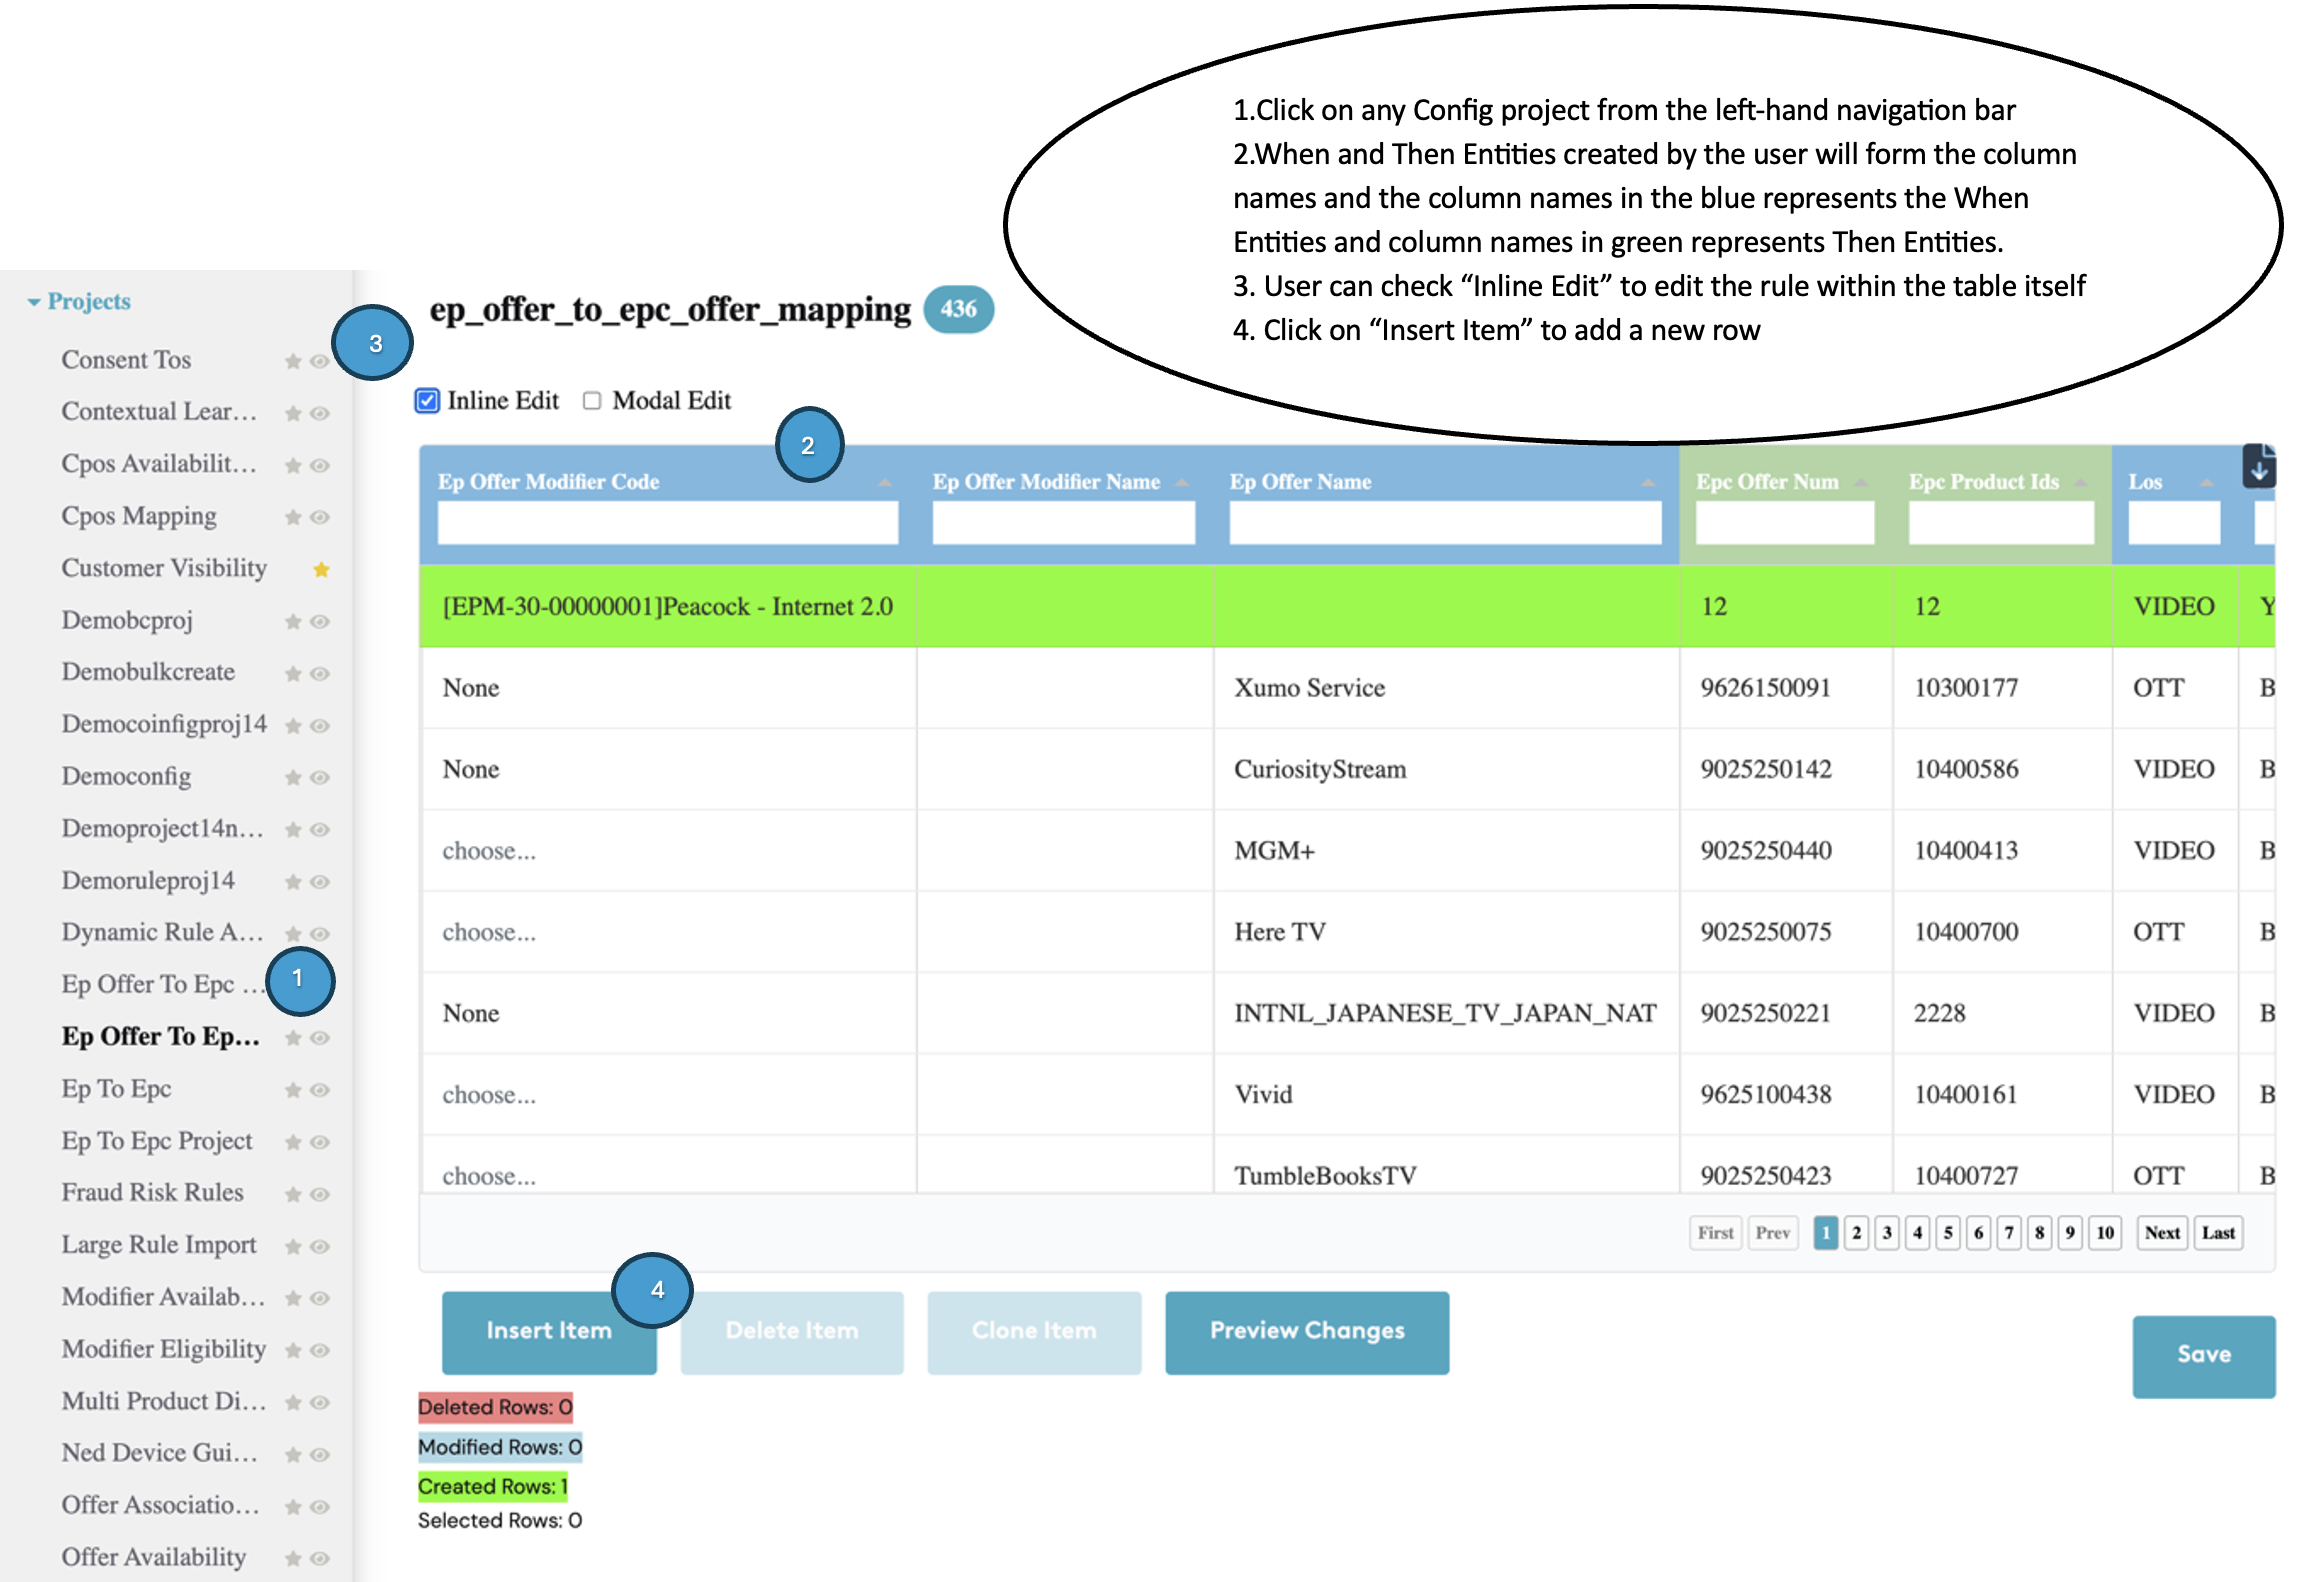
- From the list of Projects, select the config project to which you want to add the rule(s).
- Click on "Insert Item" button.
- There are two options for editing: Inline Edit and Modal Edit.
- Inline Edit allows users to edit directly within the table itself.
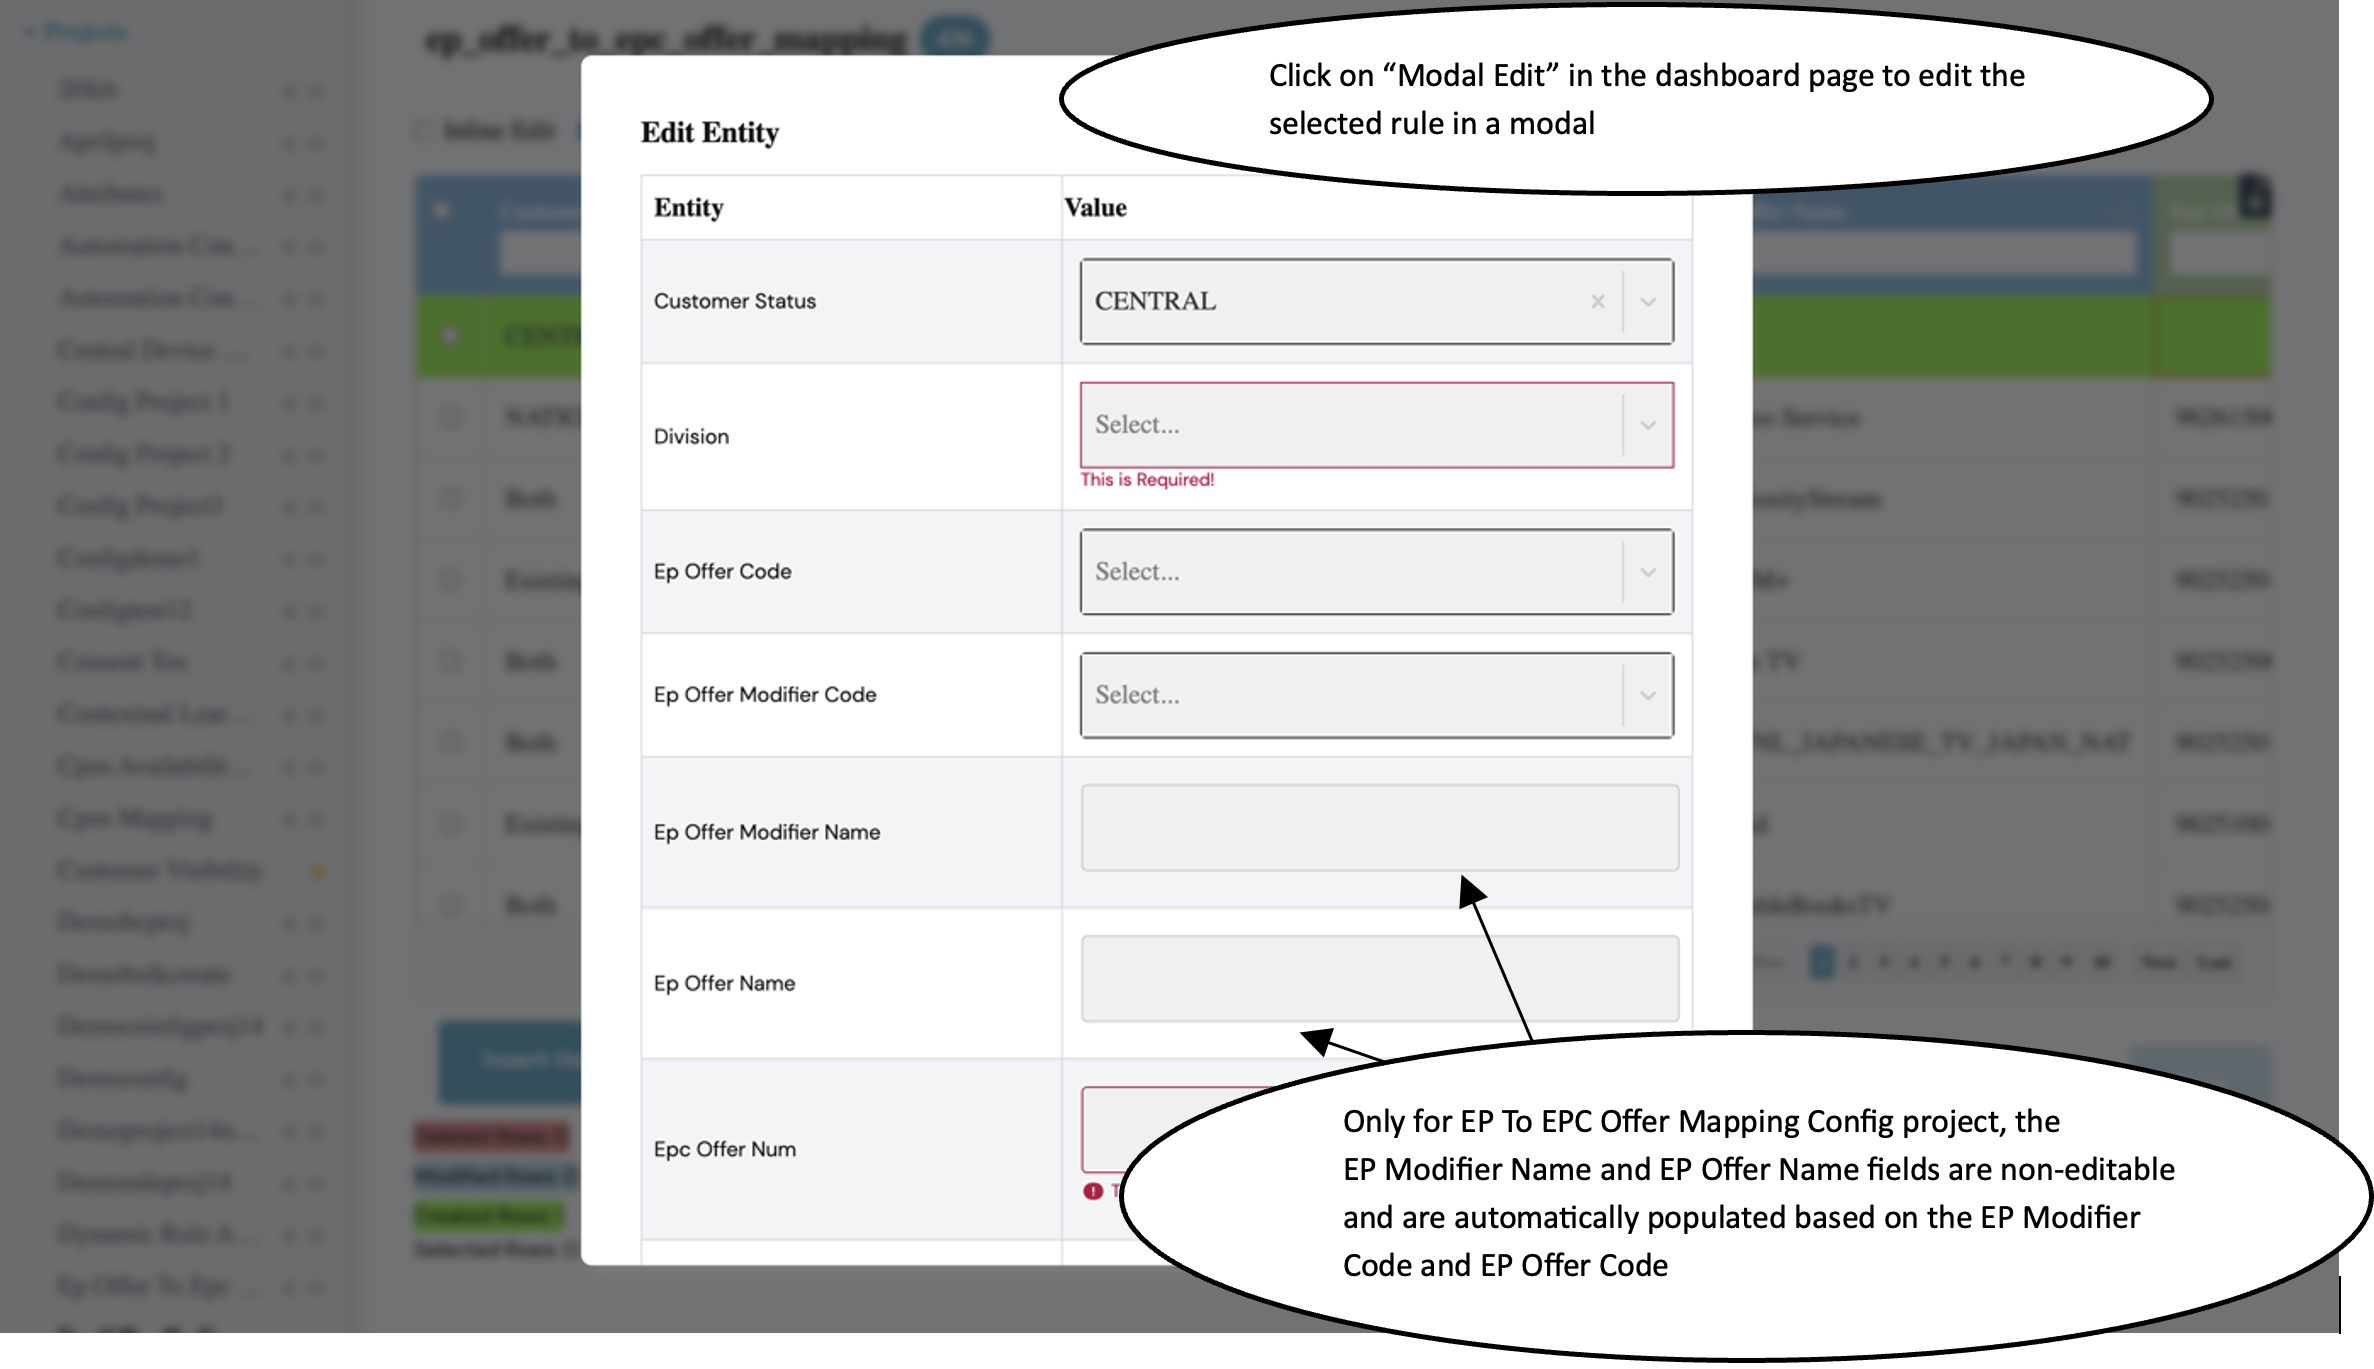
- Clicking on "Modal Edit" opens a modal for the selected rule, where all the necessary details can be added.
- Based on the user's selection, rules can be added either through Inline Edit or Modal Edit.
- Any modification made to a row will highlight the modified row.
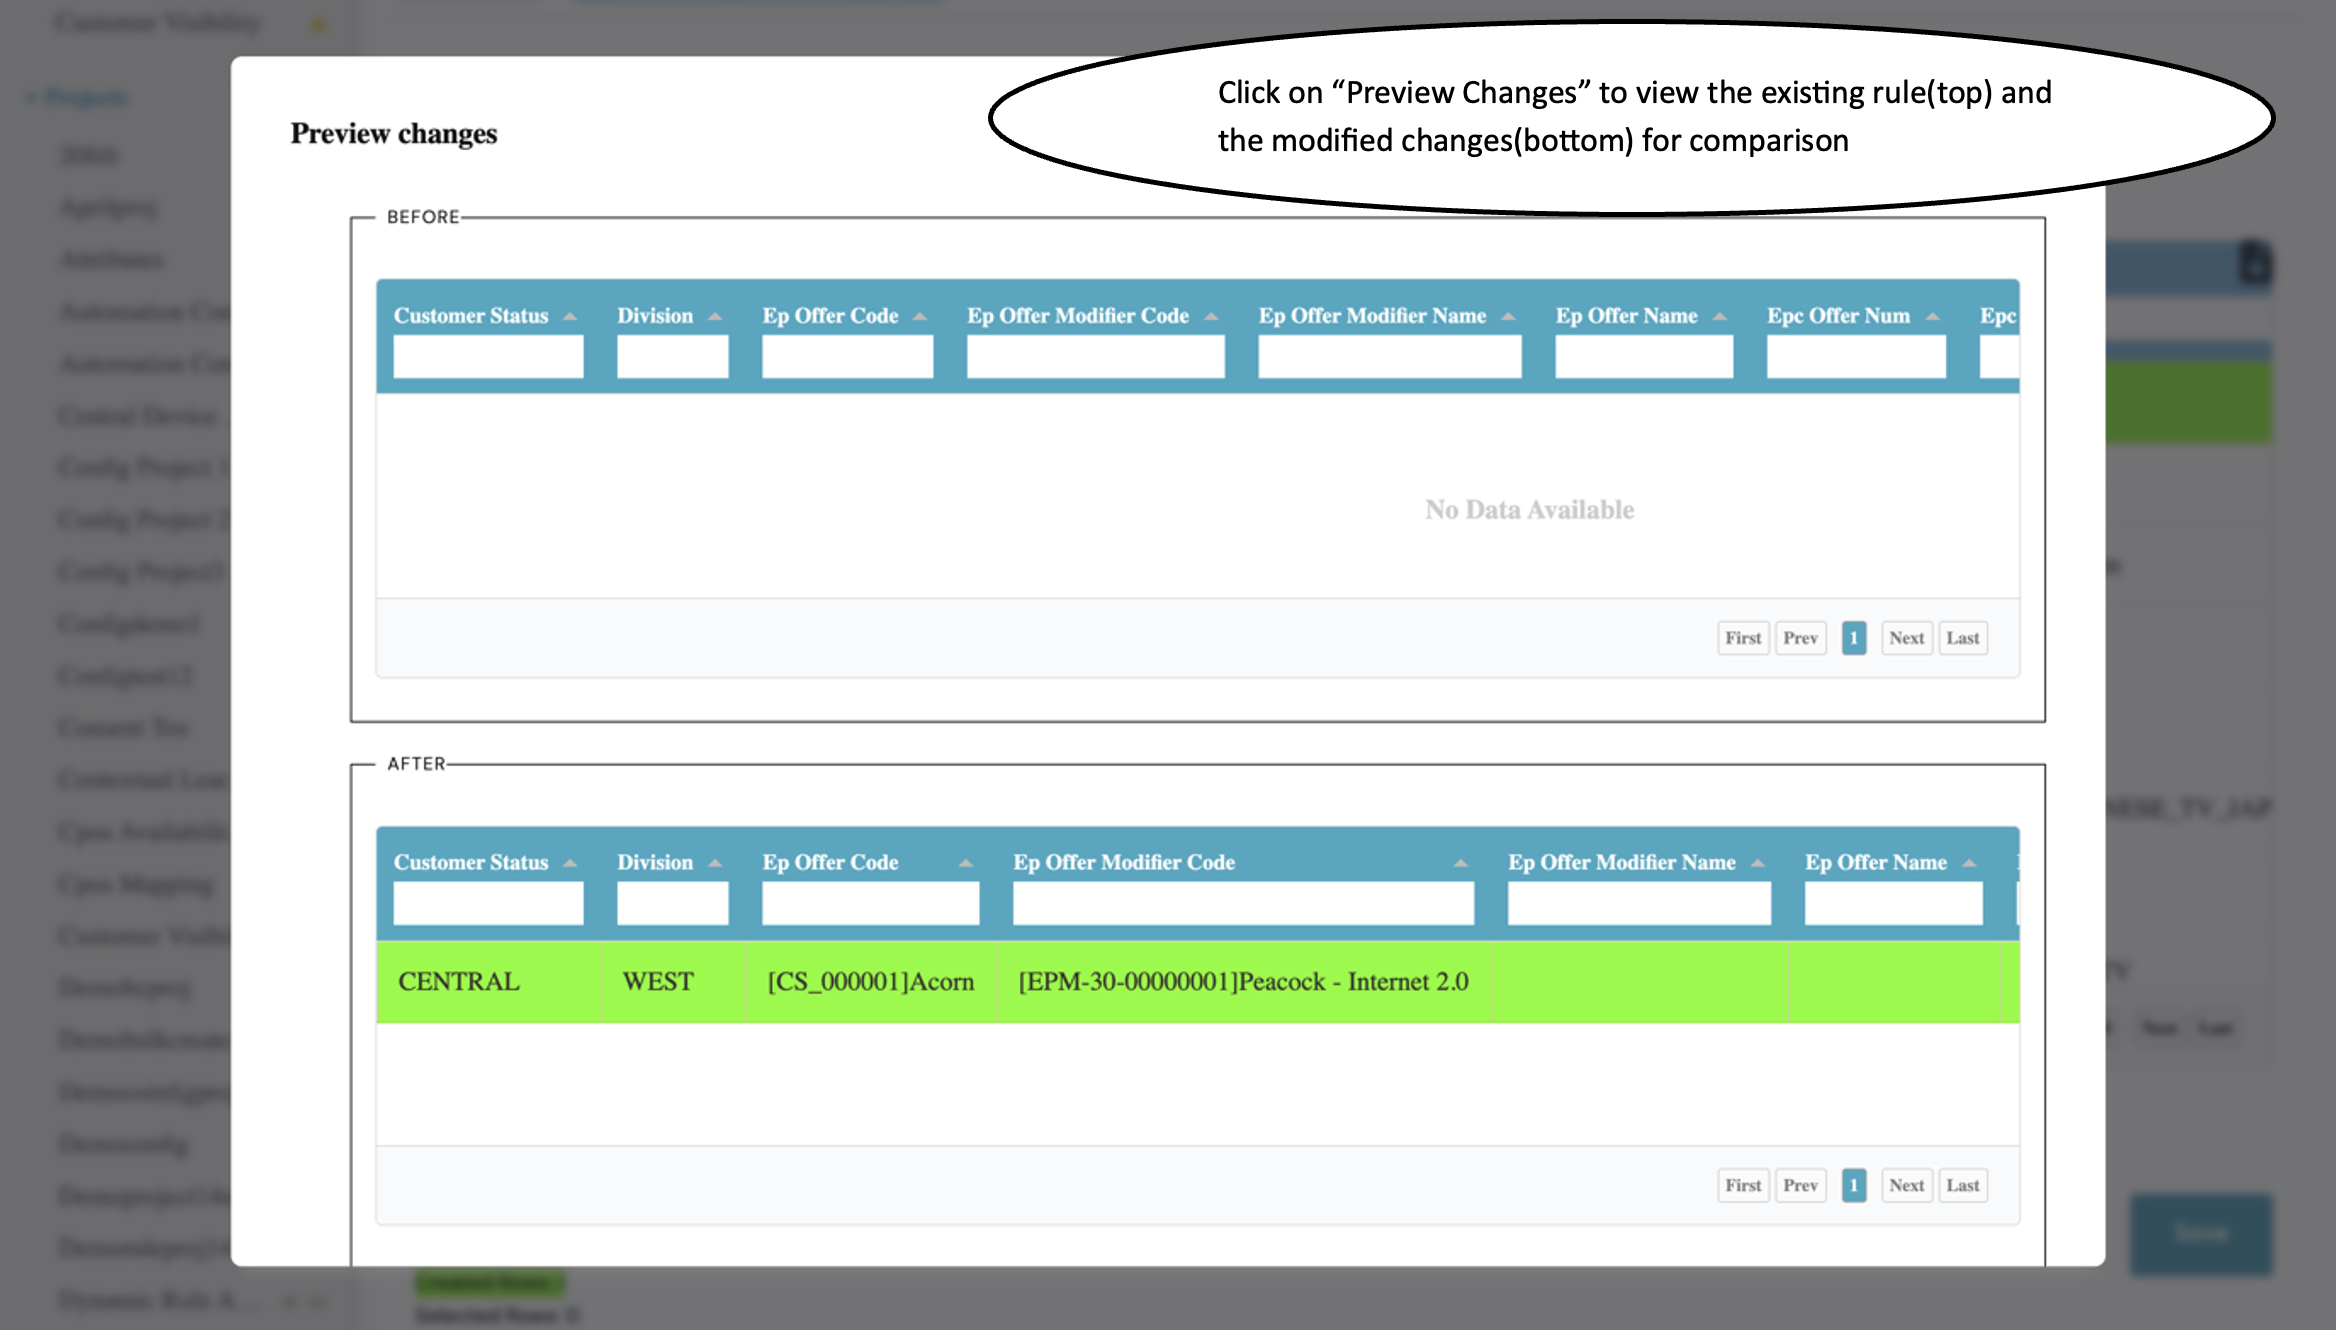
- The "Preview Changes" button will be enabled after a modification.
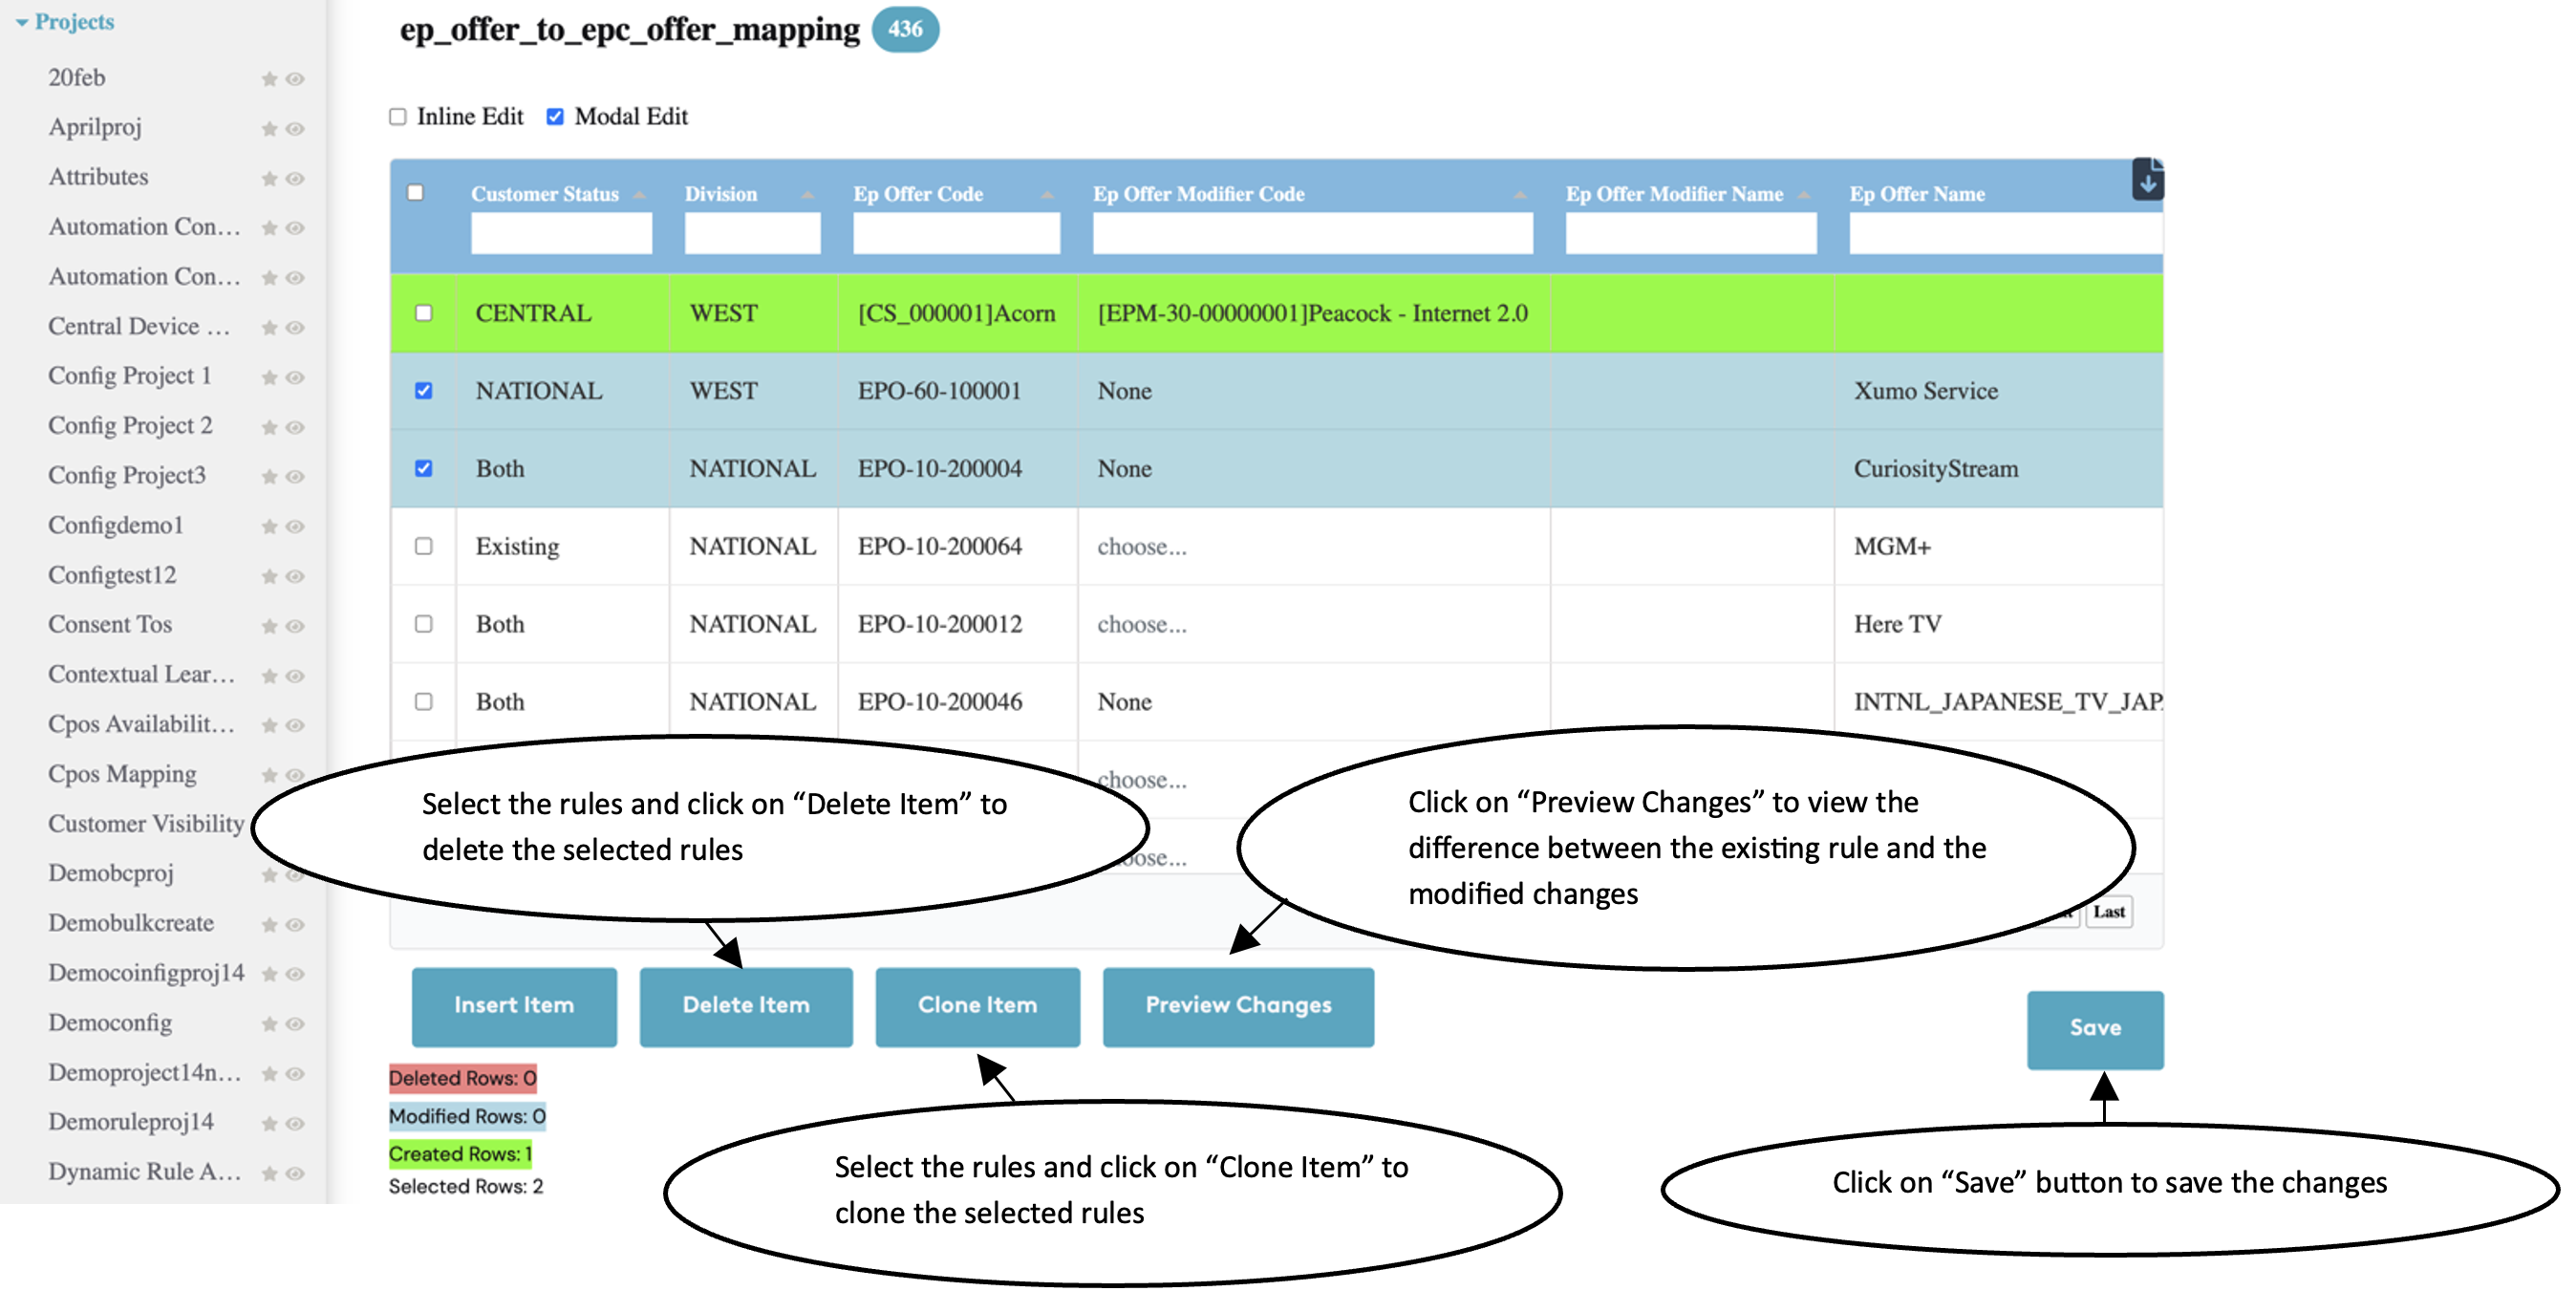
- Clicking on the 'Preview Changes' button will display a comparison view, with the original values on the left-hand side and the latest edited changes on the right-hand side.
- Click on "Save" button to save the changes.
Key-highlights
- Only for EP to EPC Offer Mapping, the Modifier Name and Offer Name fields are non-editable and are automatically populated based on the EP Modifier Code and EP Offer Name.
How to modify a Rule
- From the list of Projects, select the config project to which you want to modify the rule(s).
- There are two options for editing: Inline Edit and Modal Edit.
- Inline Edit allows users to edit directly within the table itself.
- Clicking on "Modal Edit" opens a modal for the selected rule, where all the necessary details can be added.
- Based on the user's selection, rules can be edited either through Inline Edit or Modal Edit.
- User can view the edited changes in the preview modal.
- Click on "Save" button to save the changes.
How to delete a Rule
- User can select one or more rules and clicking on the "Delete Item" will delete the selected rules from the project.
- Click on "Save" button to save the changes.
How to clone a Rule
- User can select one or more rules and click on "Clone Item" button.
- The selected rule(s) will be cloned and user can edit the rules and view the edited changes in preview modal for comparison.
- Click on "Save" button to save the changes.
Key-highlights
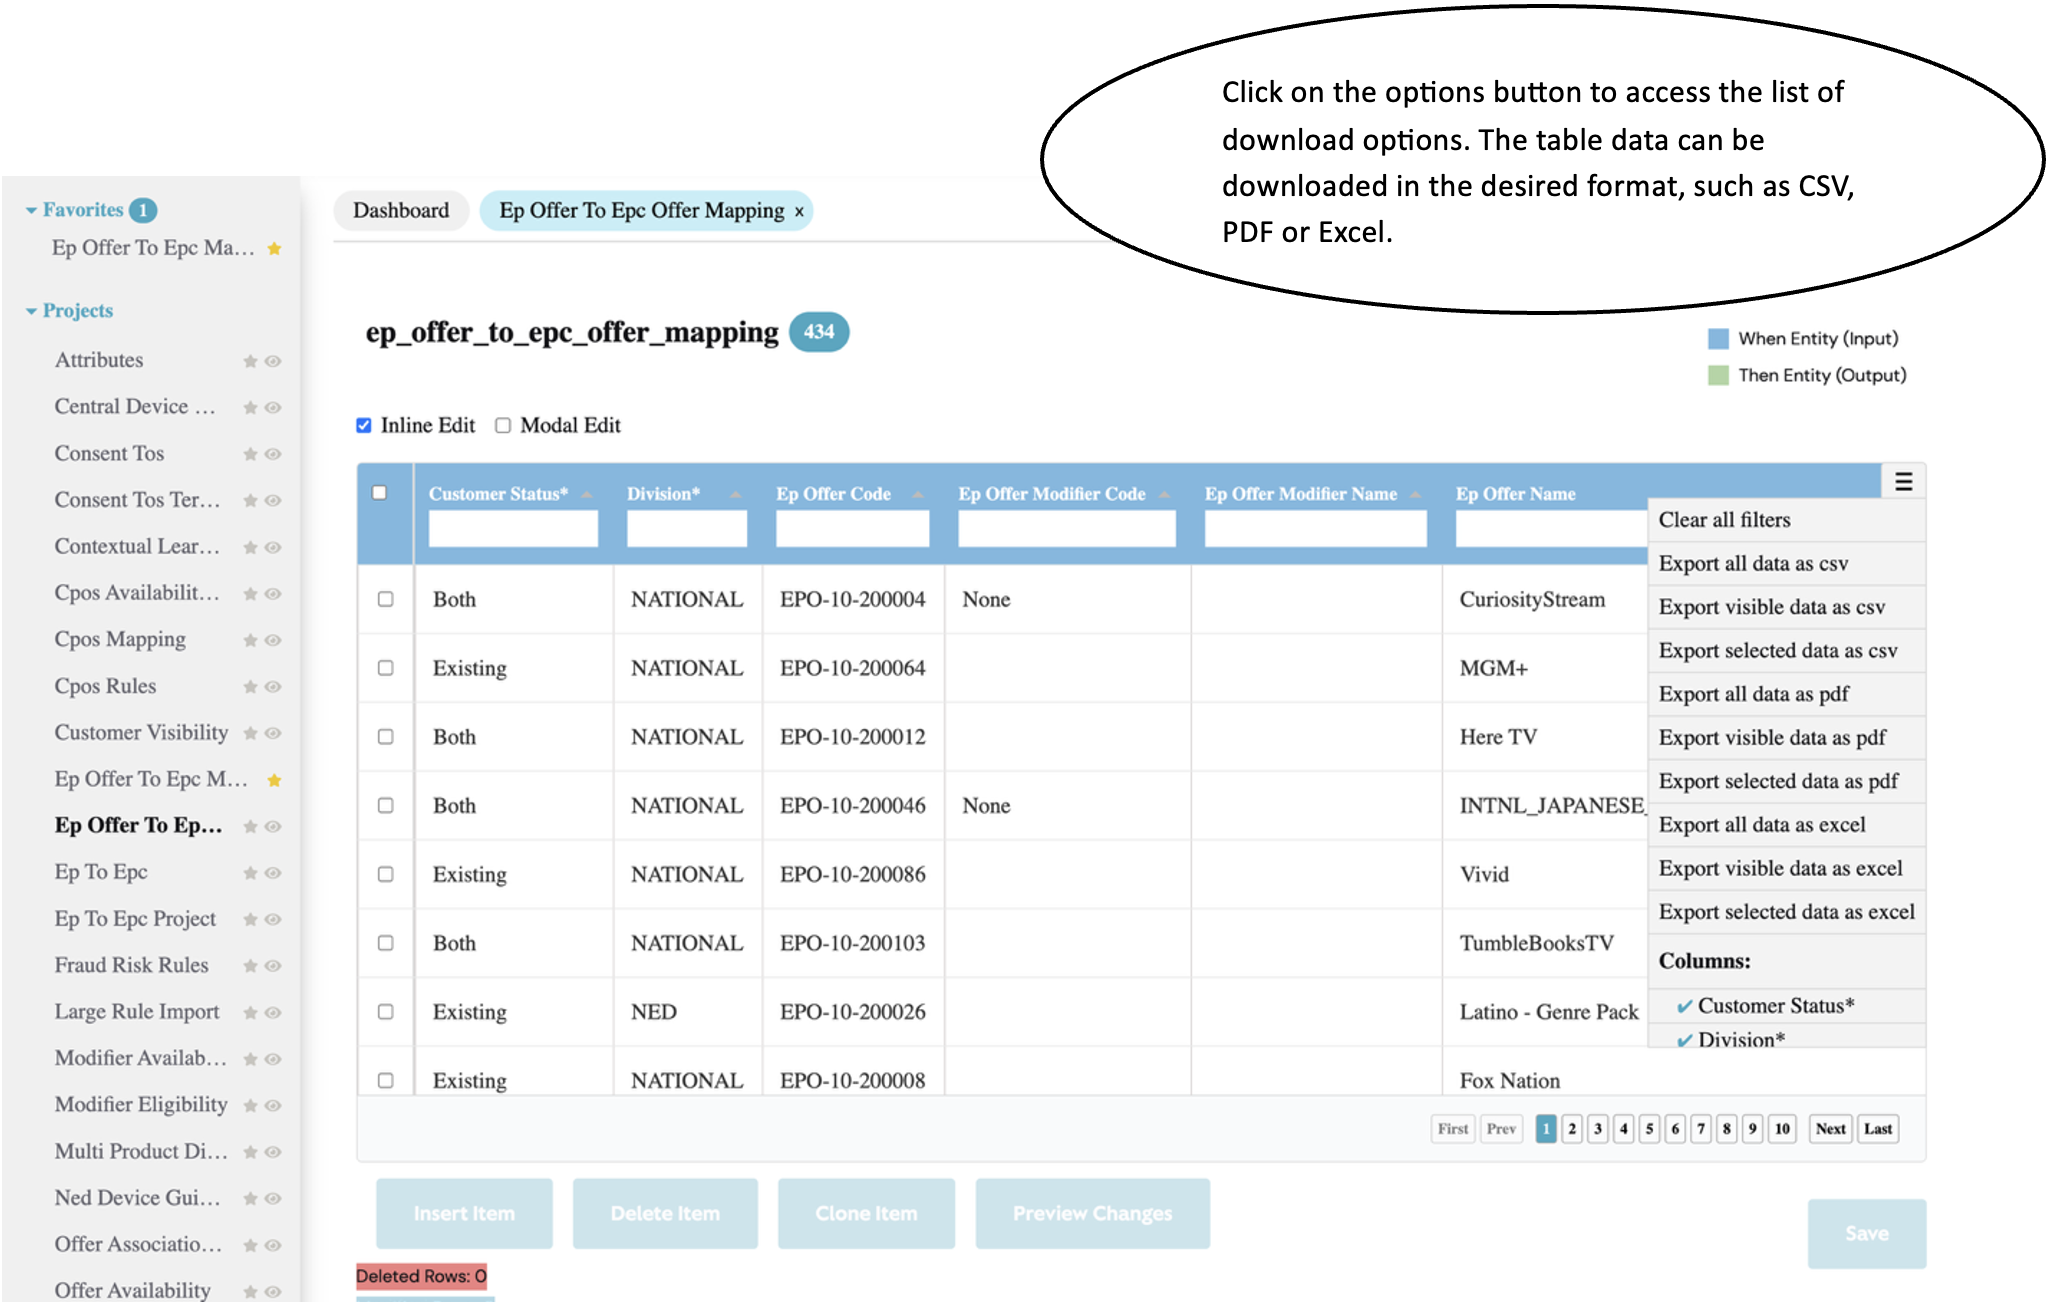
- Click on the options icon located at the top-right corner of the table to access a list of download options. The table data can be downloaded in the desired format, such as CSV, PDF, or Excel.
Read only users
- Users those who doesn't have write permission will see the "Insert Item", "Delete Item", "Clone Item" and "Save" buttons disabled in the Edit Config page.
- Also, the existing rules of that project can only be viewed and can't be edited.
