Tos Templates
- Tos Templates is a special kind of Config Project.
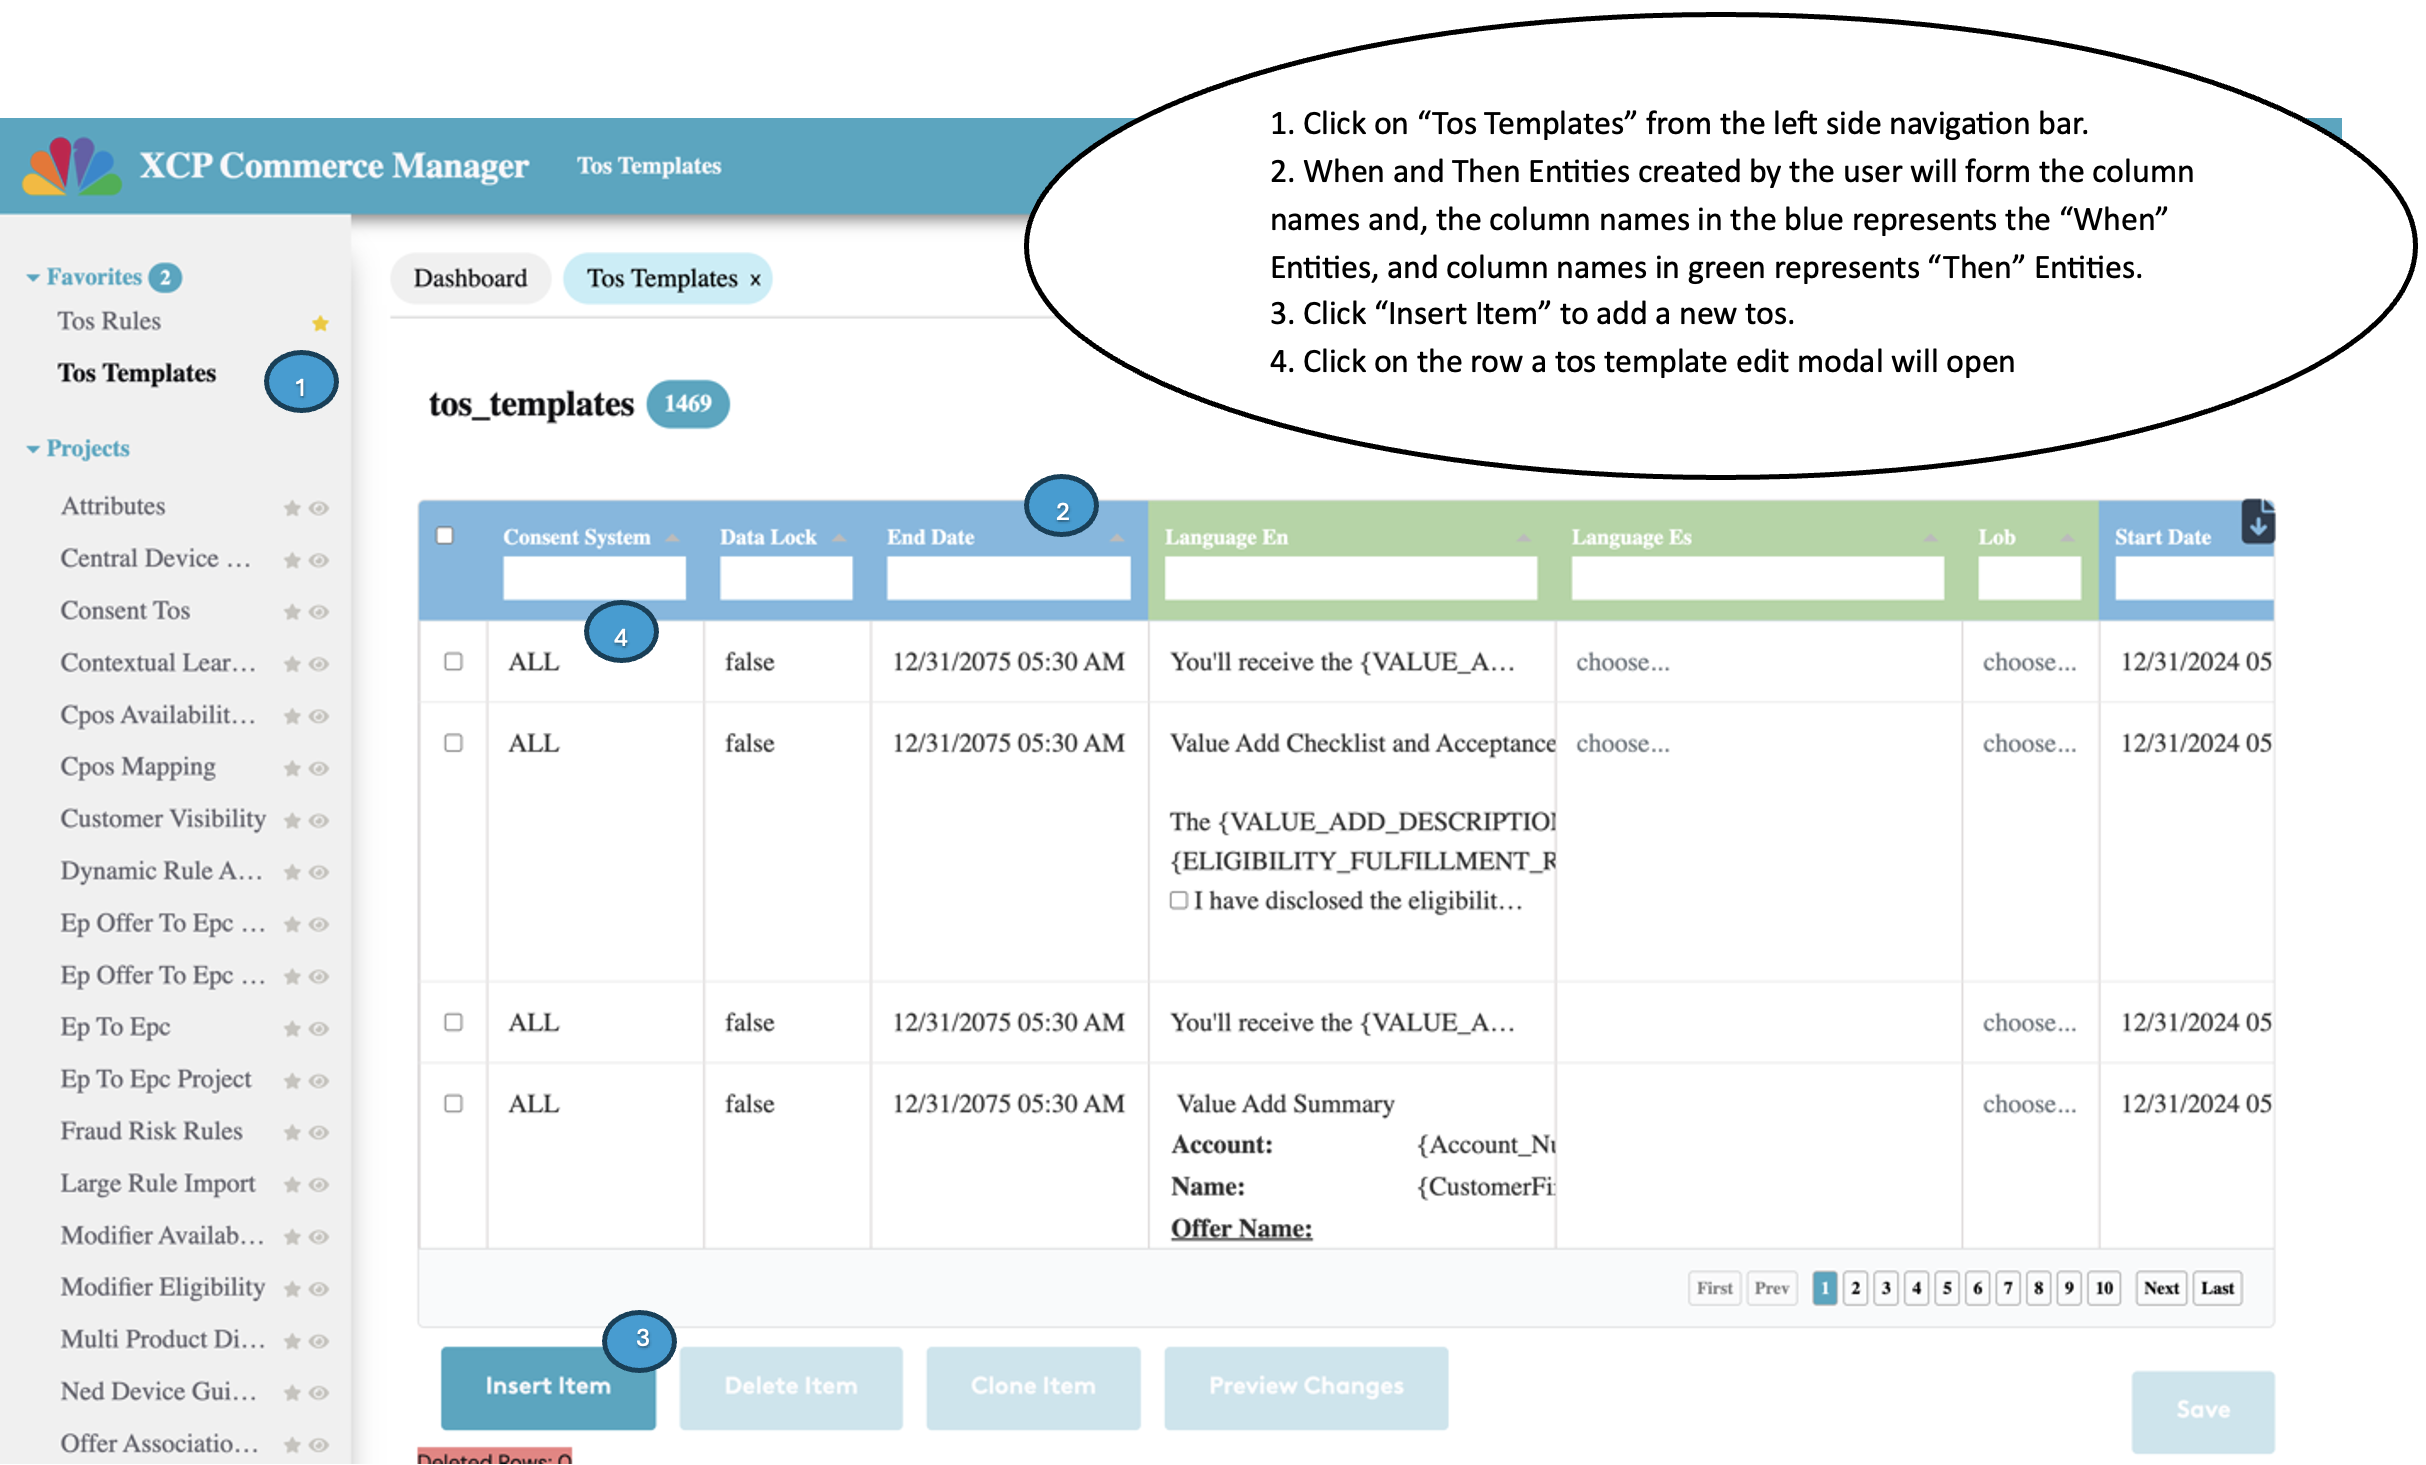
- The columns of the "Tos templates" project are configured by the "When" and "Then" Entities created for the project with the required data types.
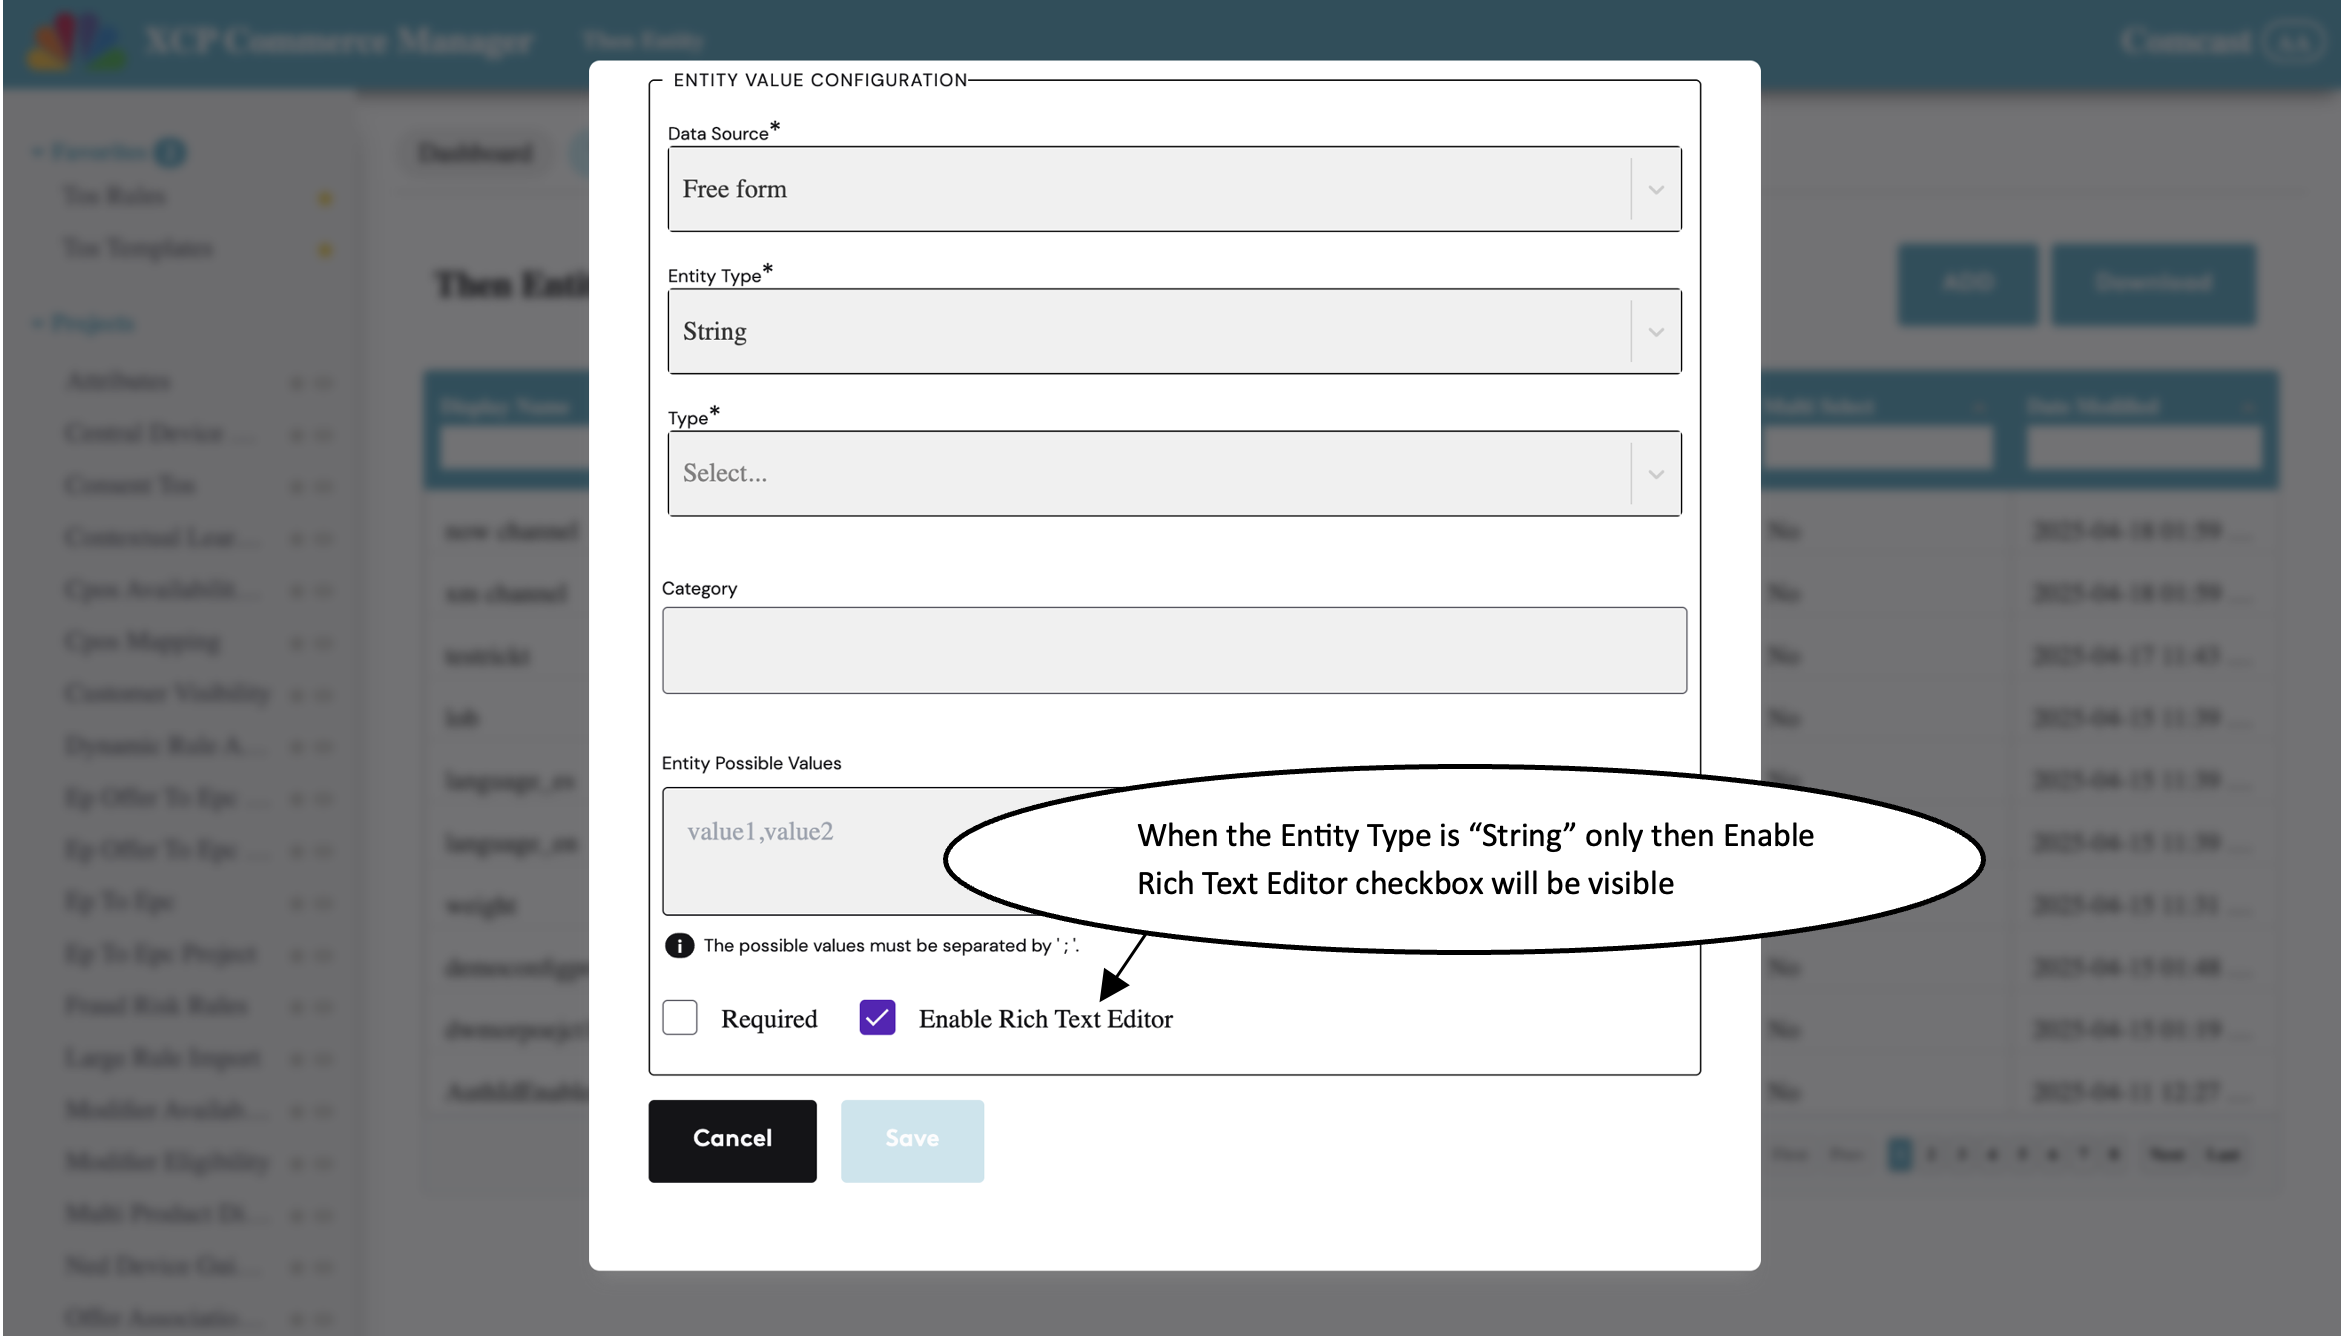
- In the "Then" Entity if the Entity Type is selected as "String", users can enable Rich Text Editor by checking on the "Enable Rich Text Editor" checkbox.
- Rich Text Editor is intended to be used only for any TOS config projects.
How to create new Tos
- Click on the "Tos Templates" project from the left hand navigation bar.
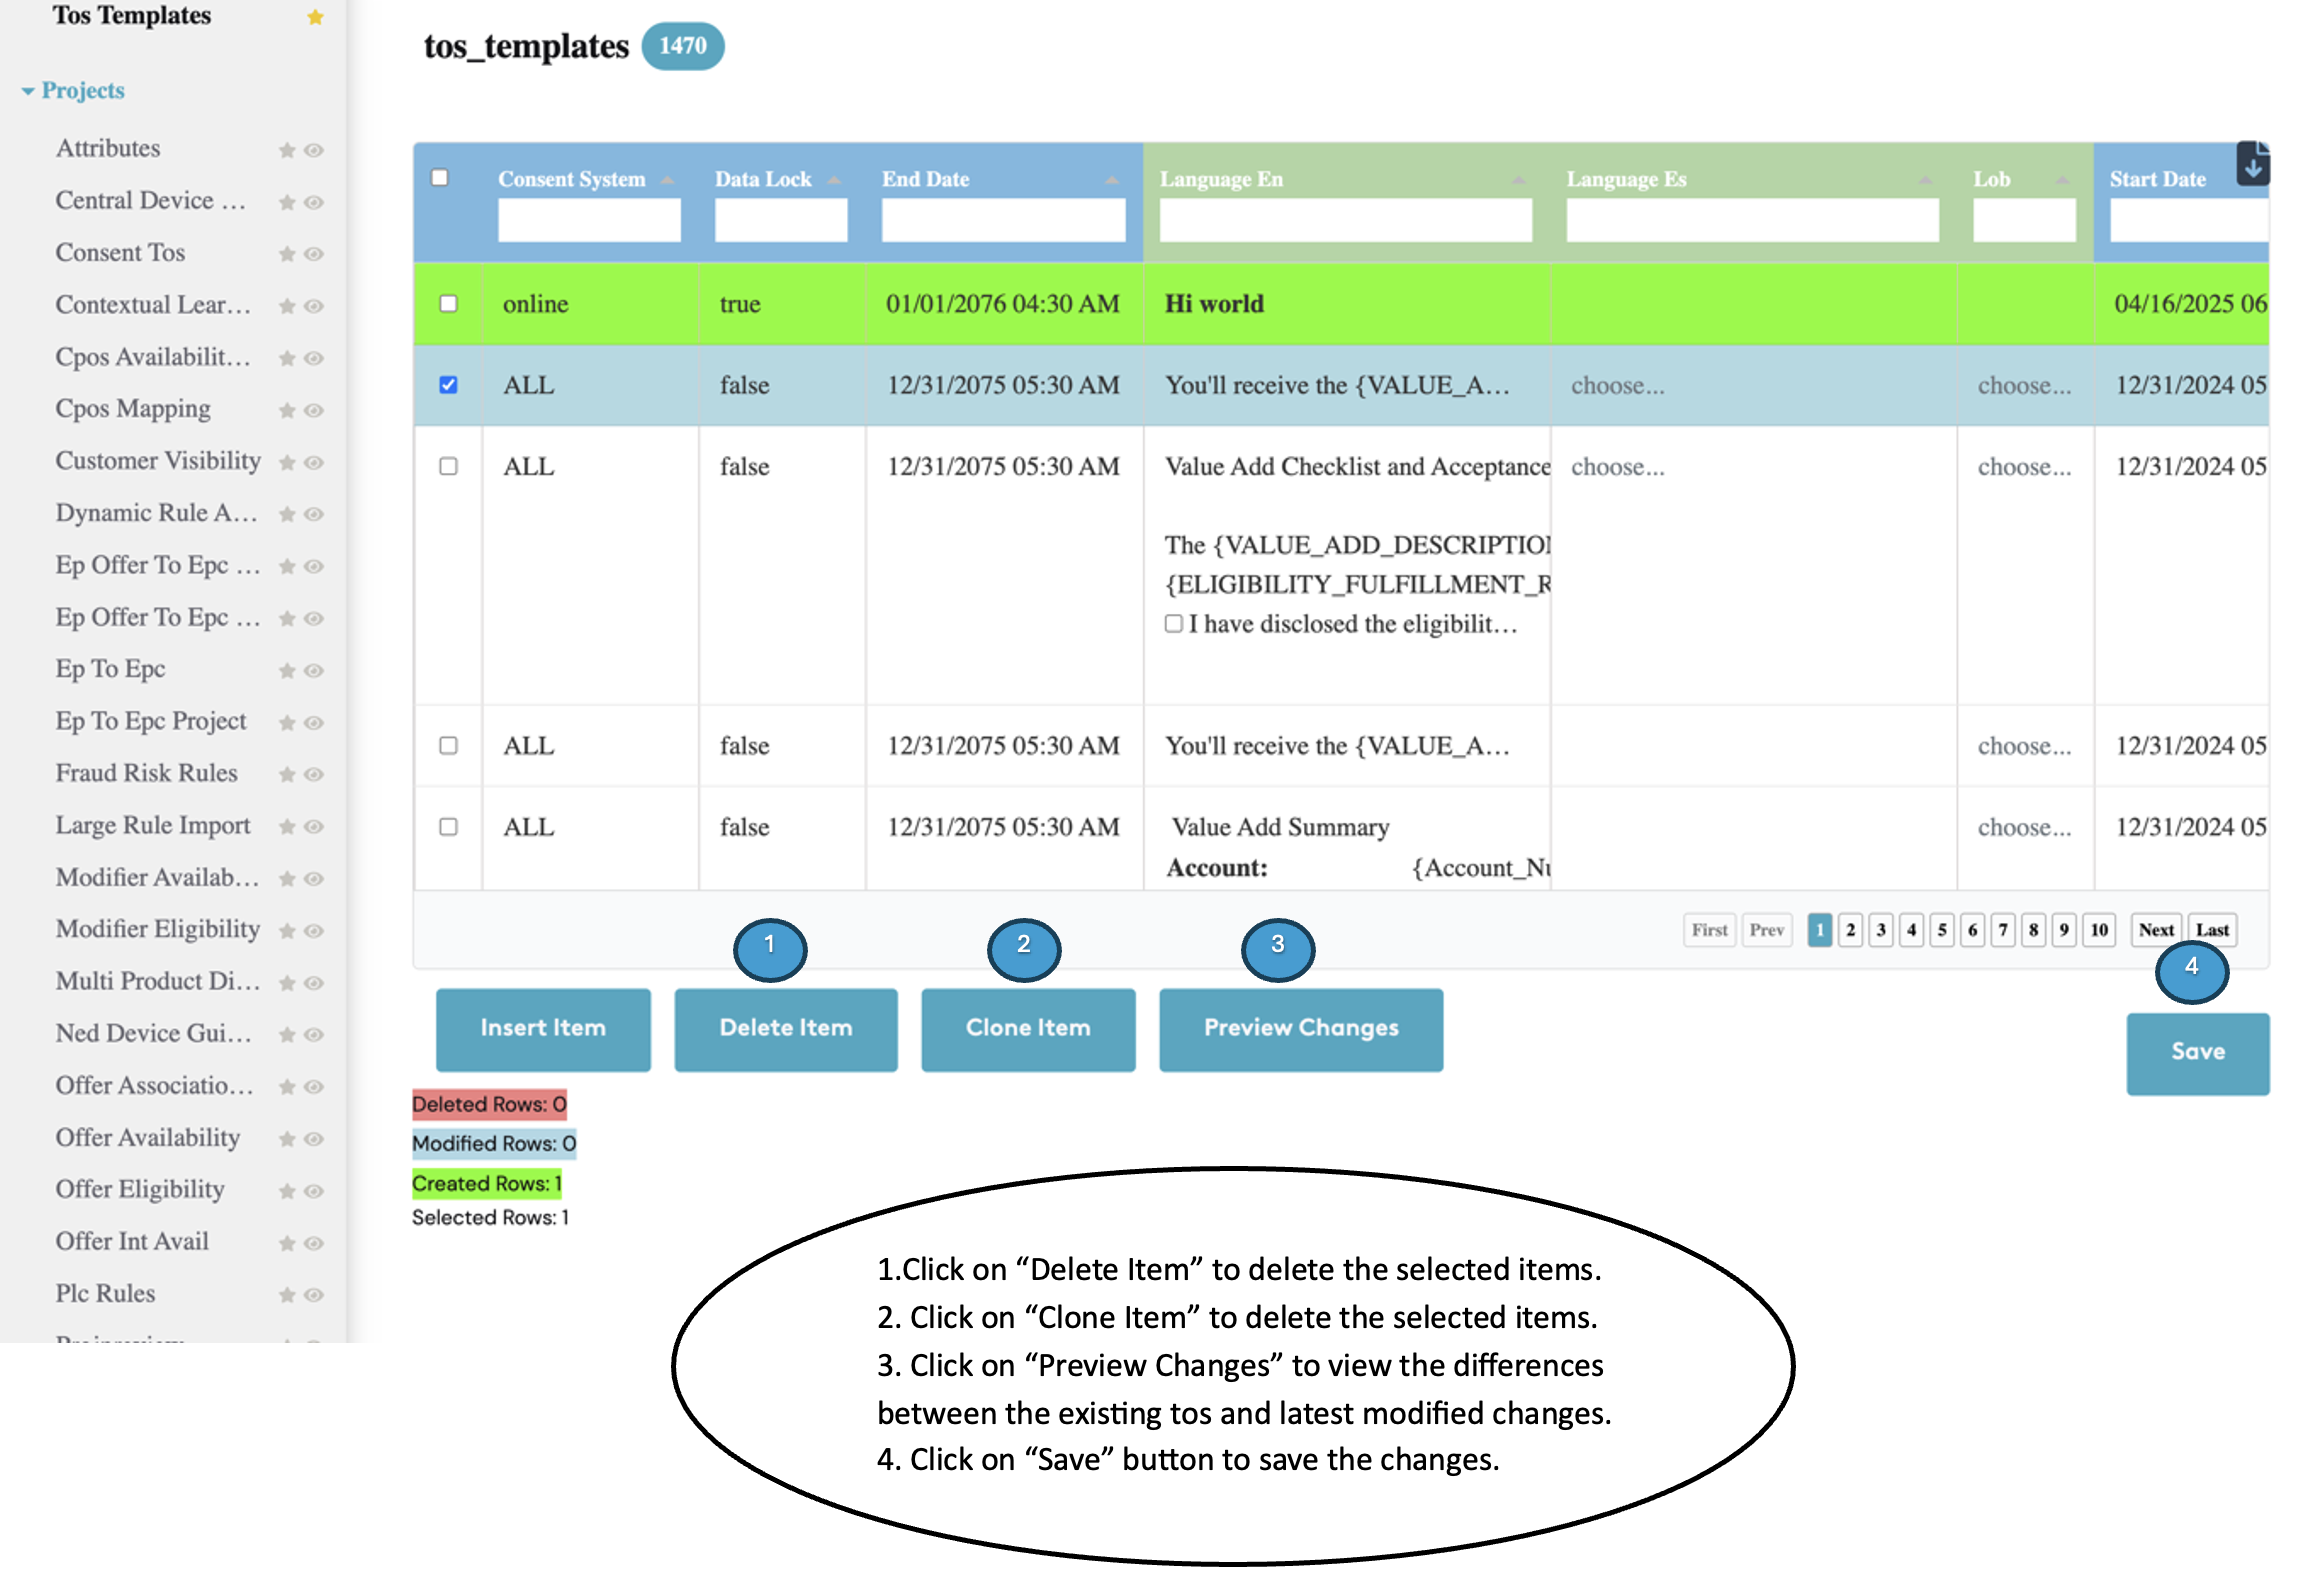
- Click on "Insert Item" button to add a new row. Clicking on the newly added row will open the Tos templates Edit Modal.
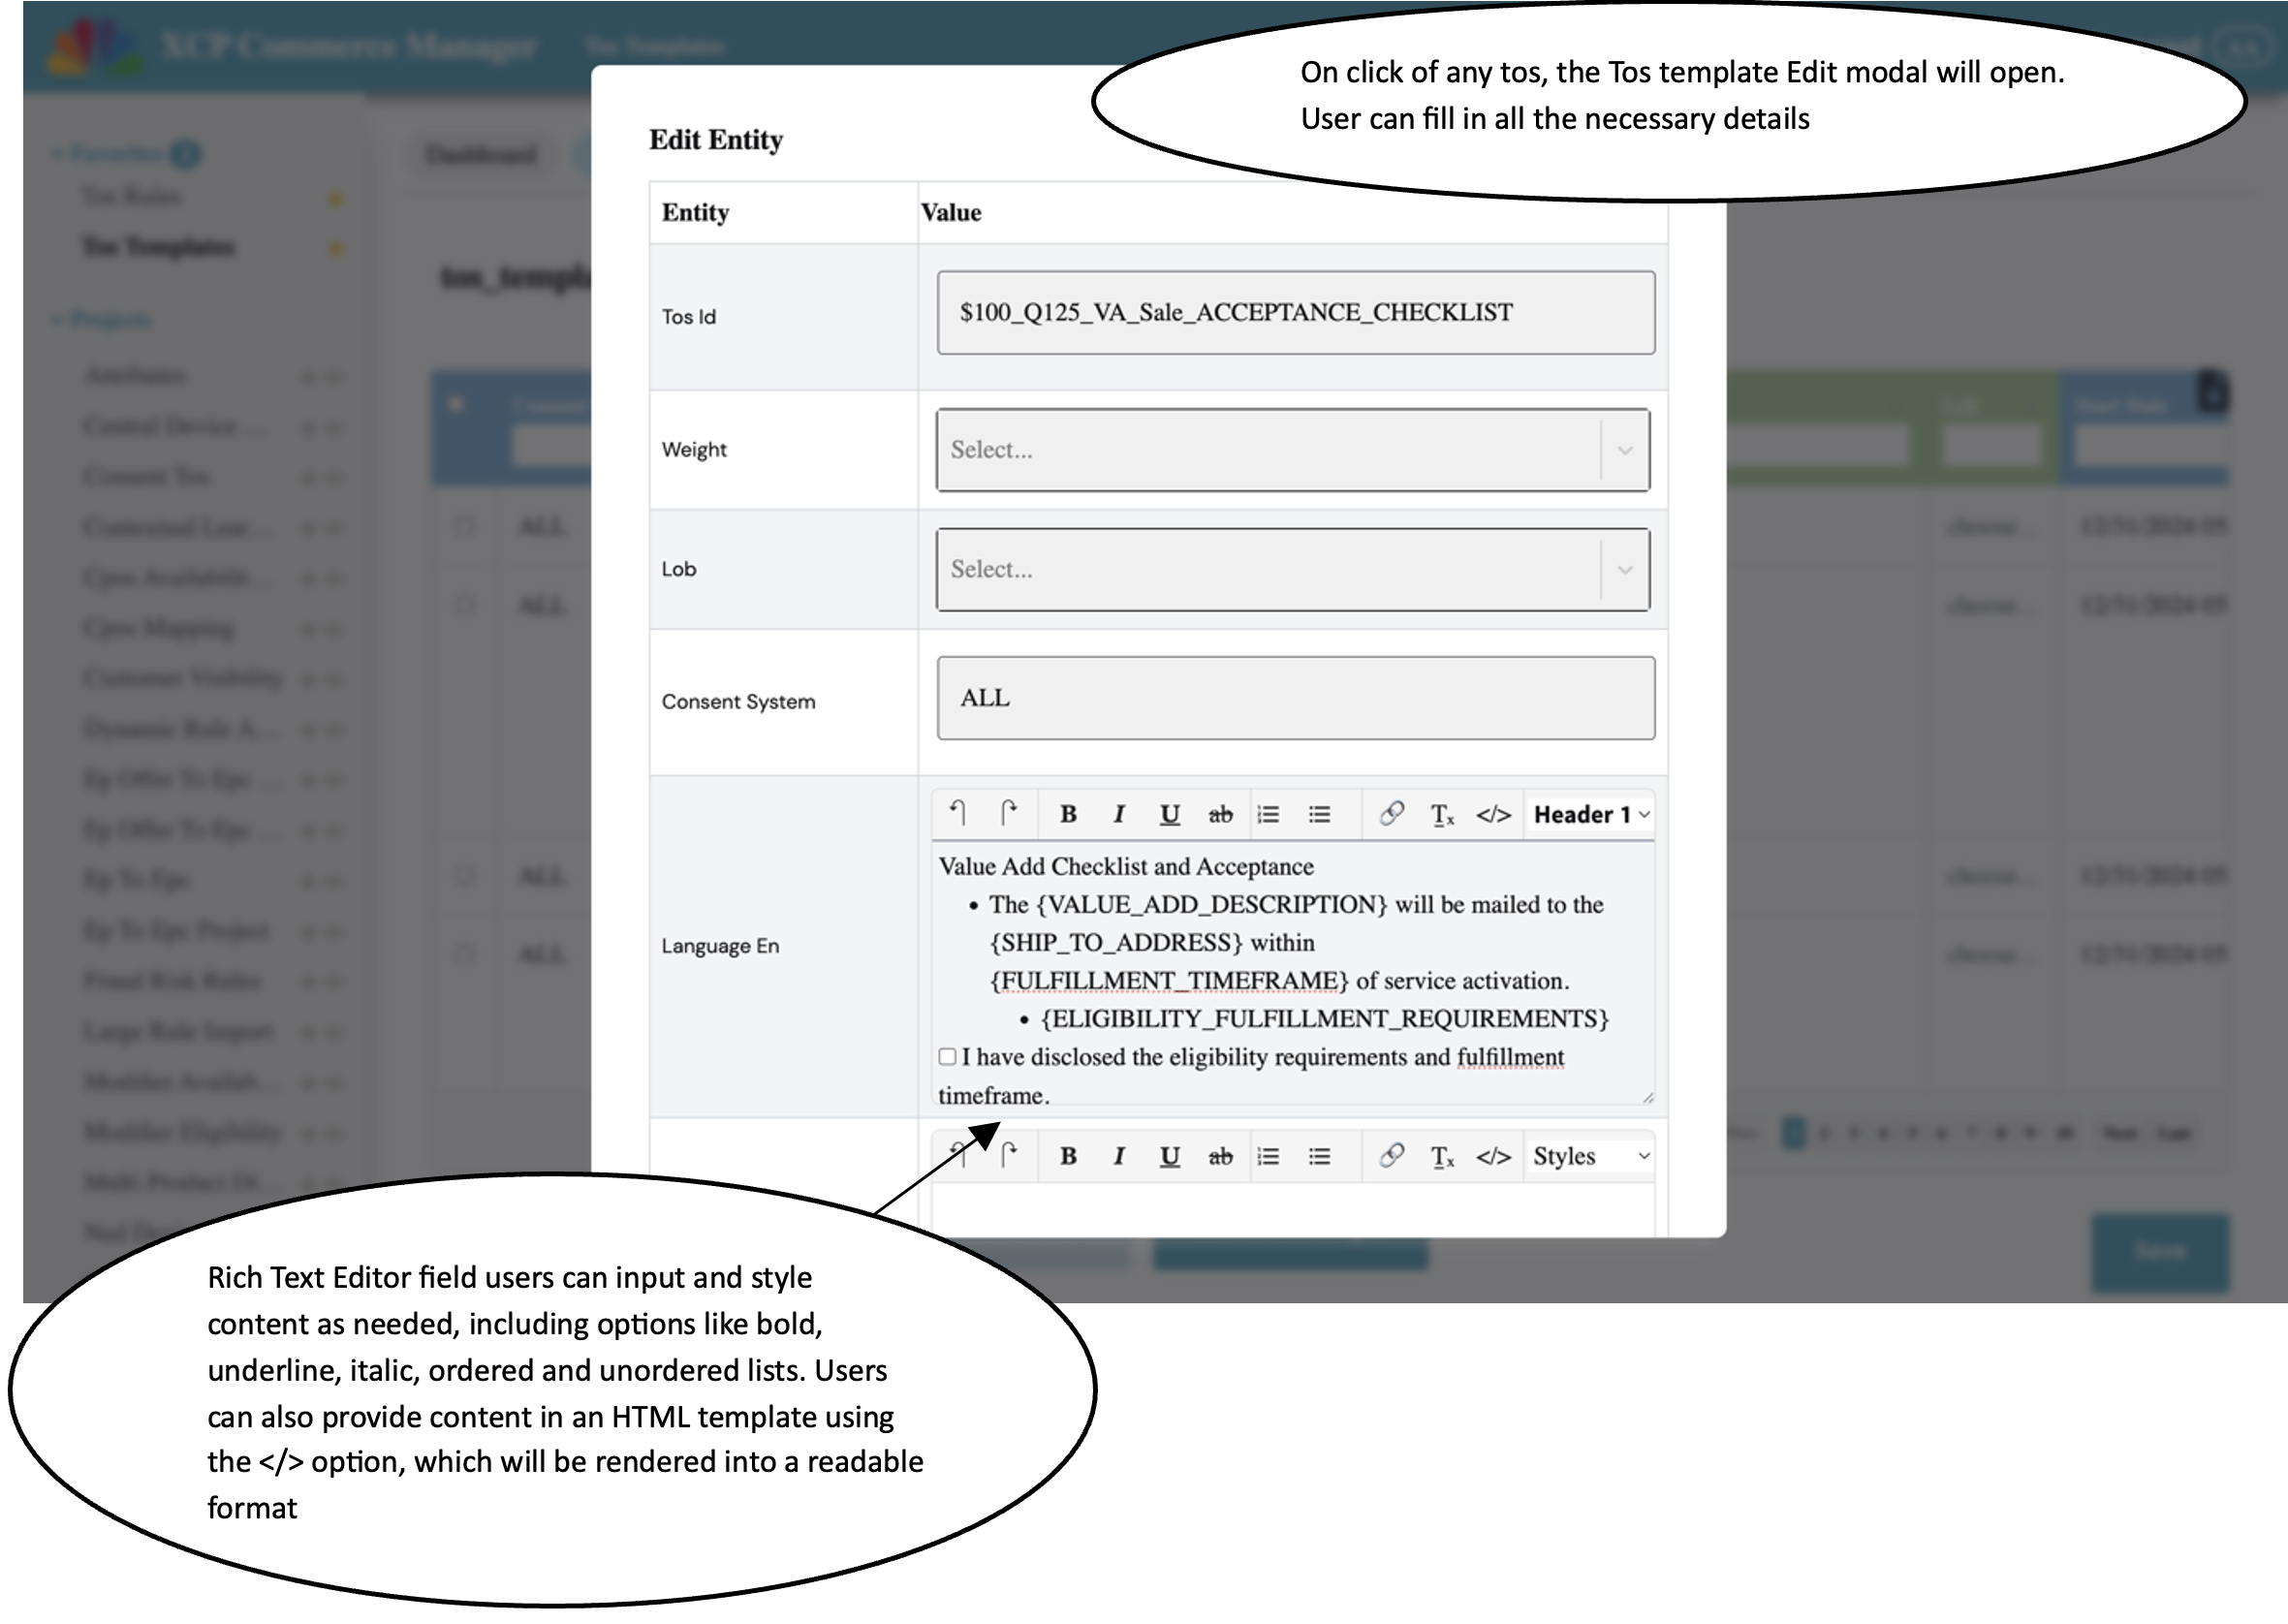
- Fill in all the necessary details.
- For fields with the Rich Text Editor in the Edit Modal, users can input and style content as needed, including options like bold, underline, italic, ordered and unordered lists. Users can also provide content in an HTML template using the option, which will be rendered into a readable format.
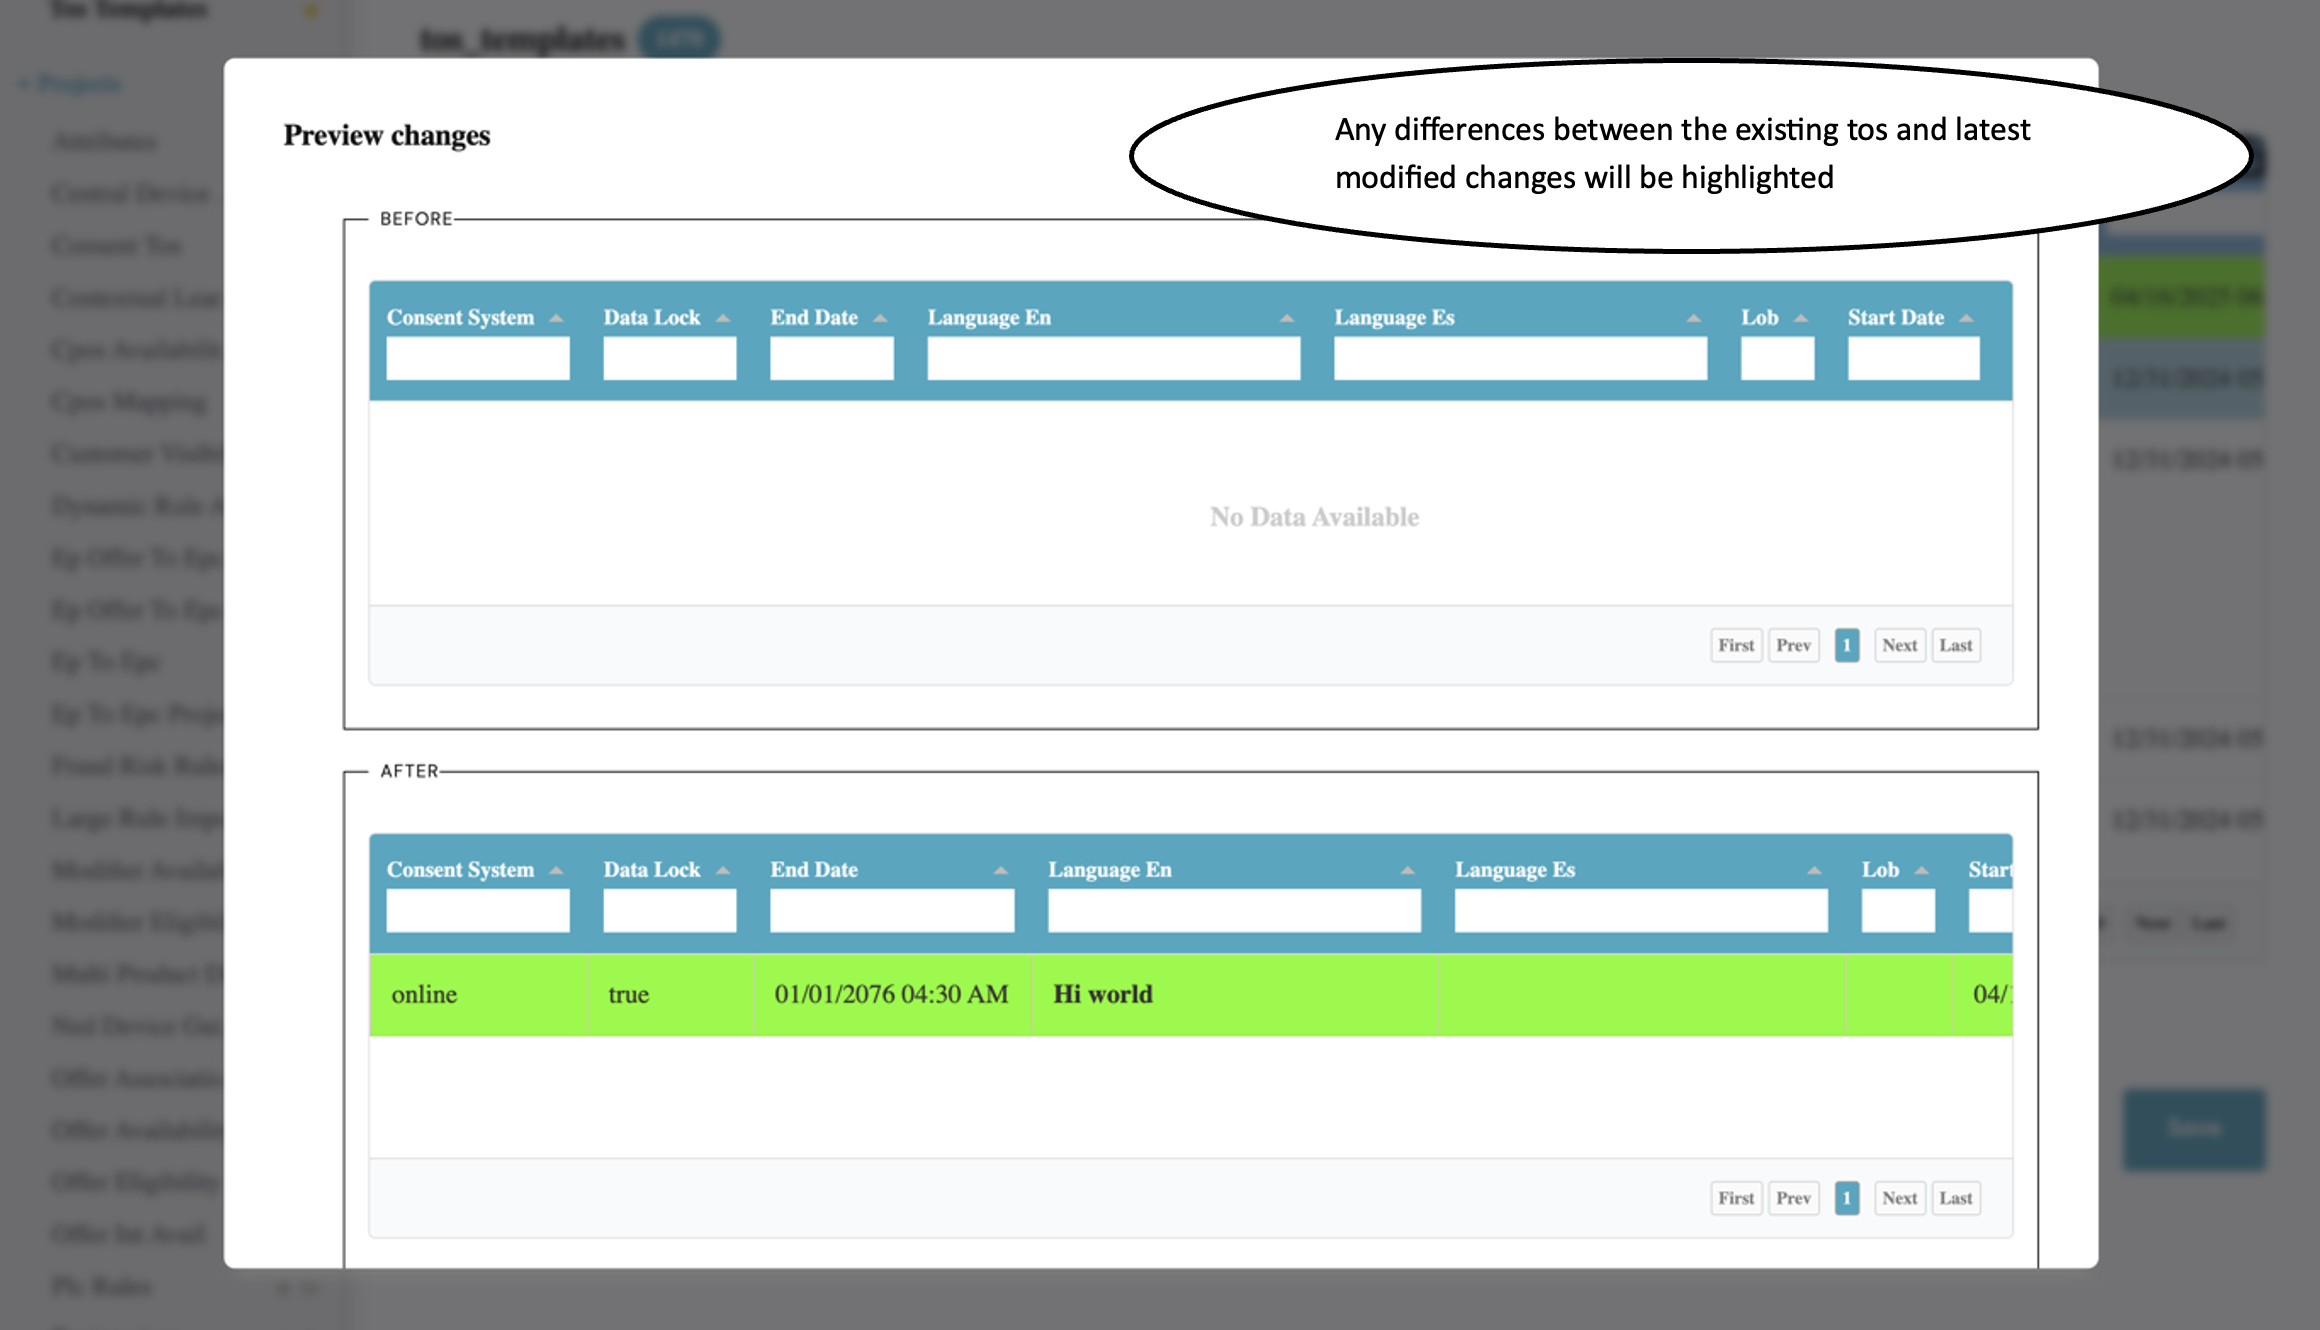
- Click on the "Preview Changes" button to view the difference between the existing tos with the latest modified changes for comparison.
- Click on "Save' button to save the changes.
How to edit Tos
- Click on any row in the Tos templates dashboard table, and the Tos templates edit modal will open.
- User can modify any desired fields.
- Clicking on the "Preview Changes" button user can view the difference between the existing tos details with the latest modified changes.
- Click on "Save' button to save the changes.
How to delete tos
- User can select one or more Tos and clicking on the "Delete Item" will delete the selected rules from the project.
- Click on "Save" button to save the changes.
How to clone a Rule
- User can select one or more Tos and click on "Clone Item" button.
- The selected Tos will be cloned and user can edit them and view the edited changes in preview modal for comparison.
- Click on "Save" button to save the changes.
Key-highlights
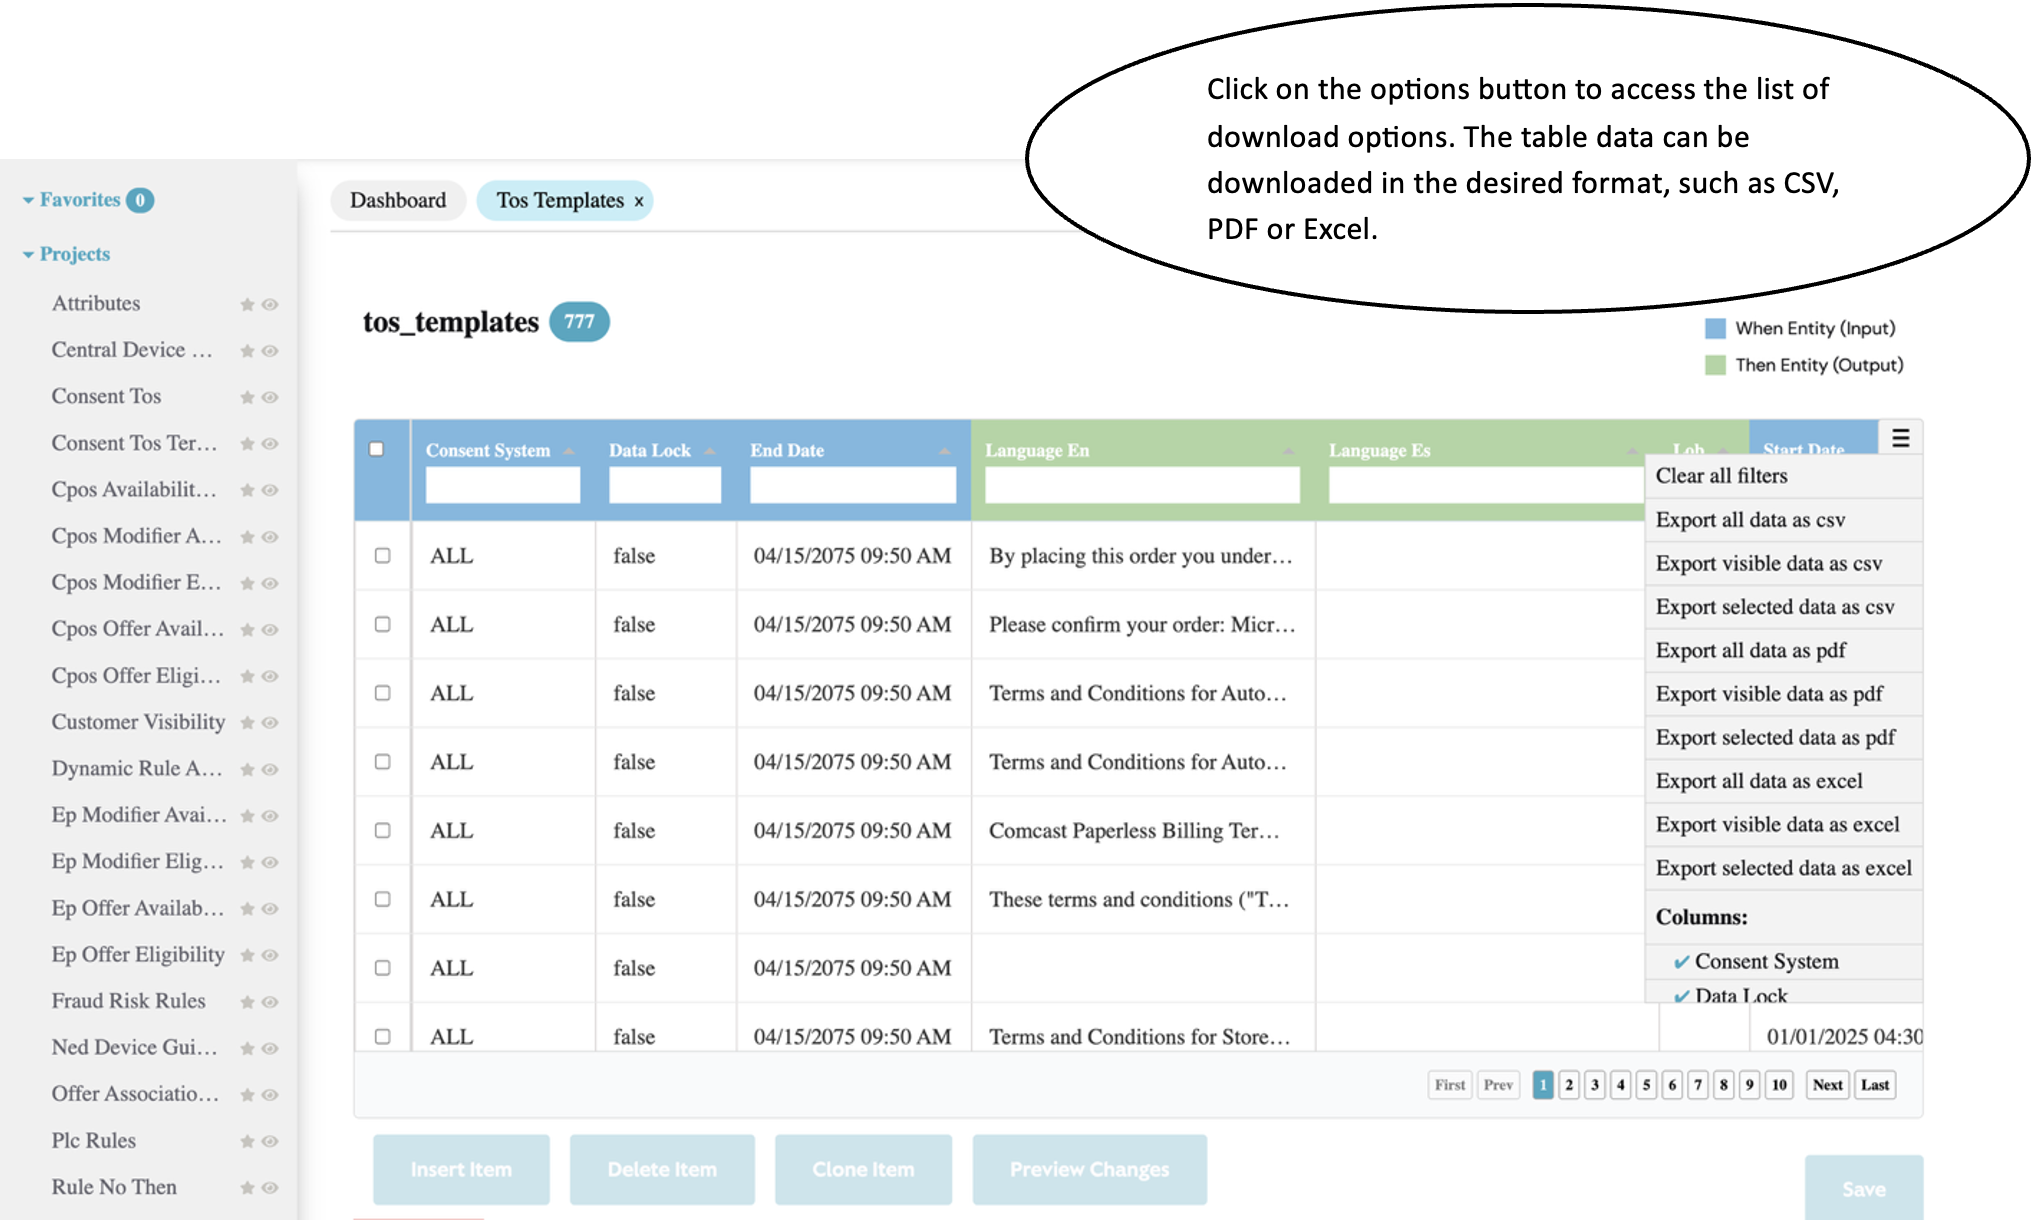
- Click on the options icon located at the top-right corner of the table to access a list of download options. The table data can be downloaded in the desired format, such as CSV, PDF, or Excel.
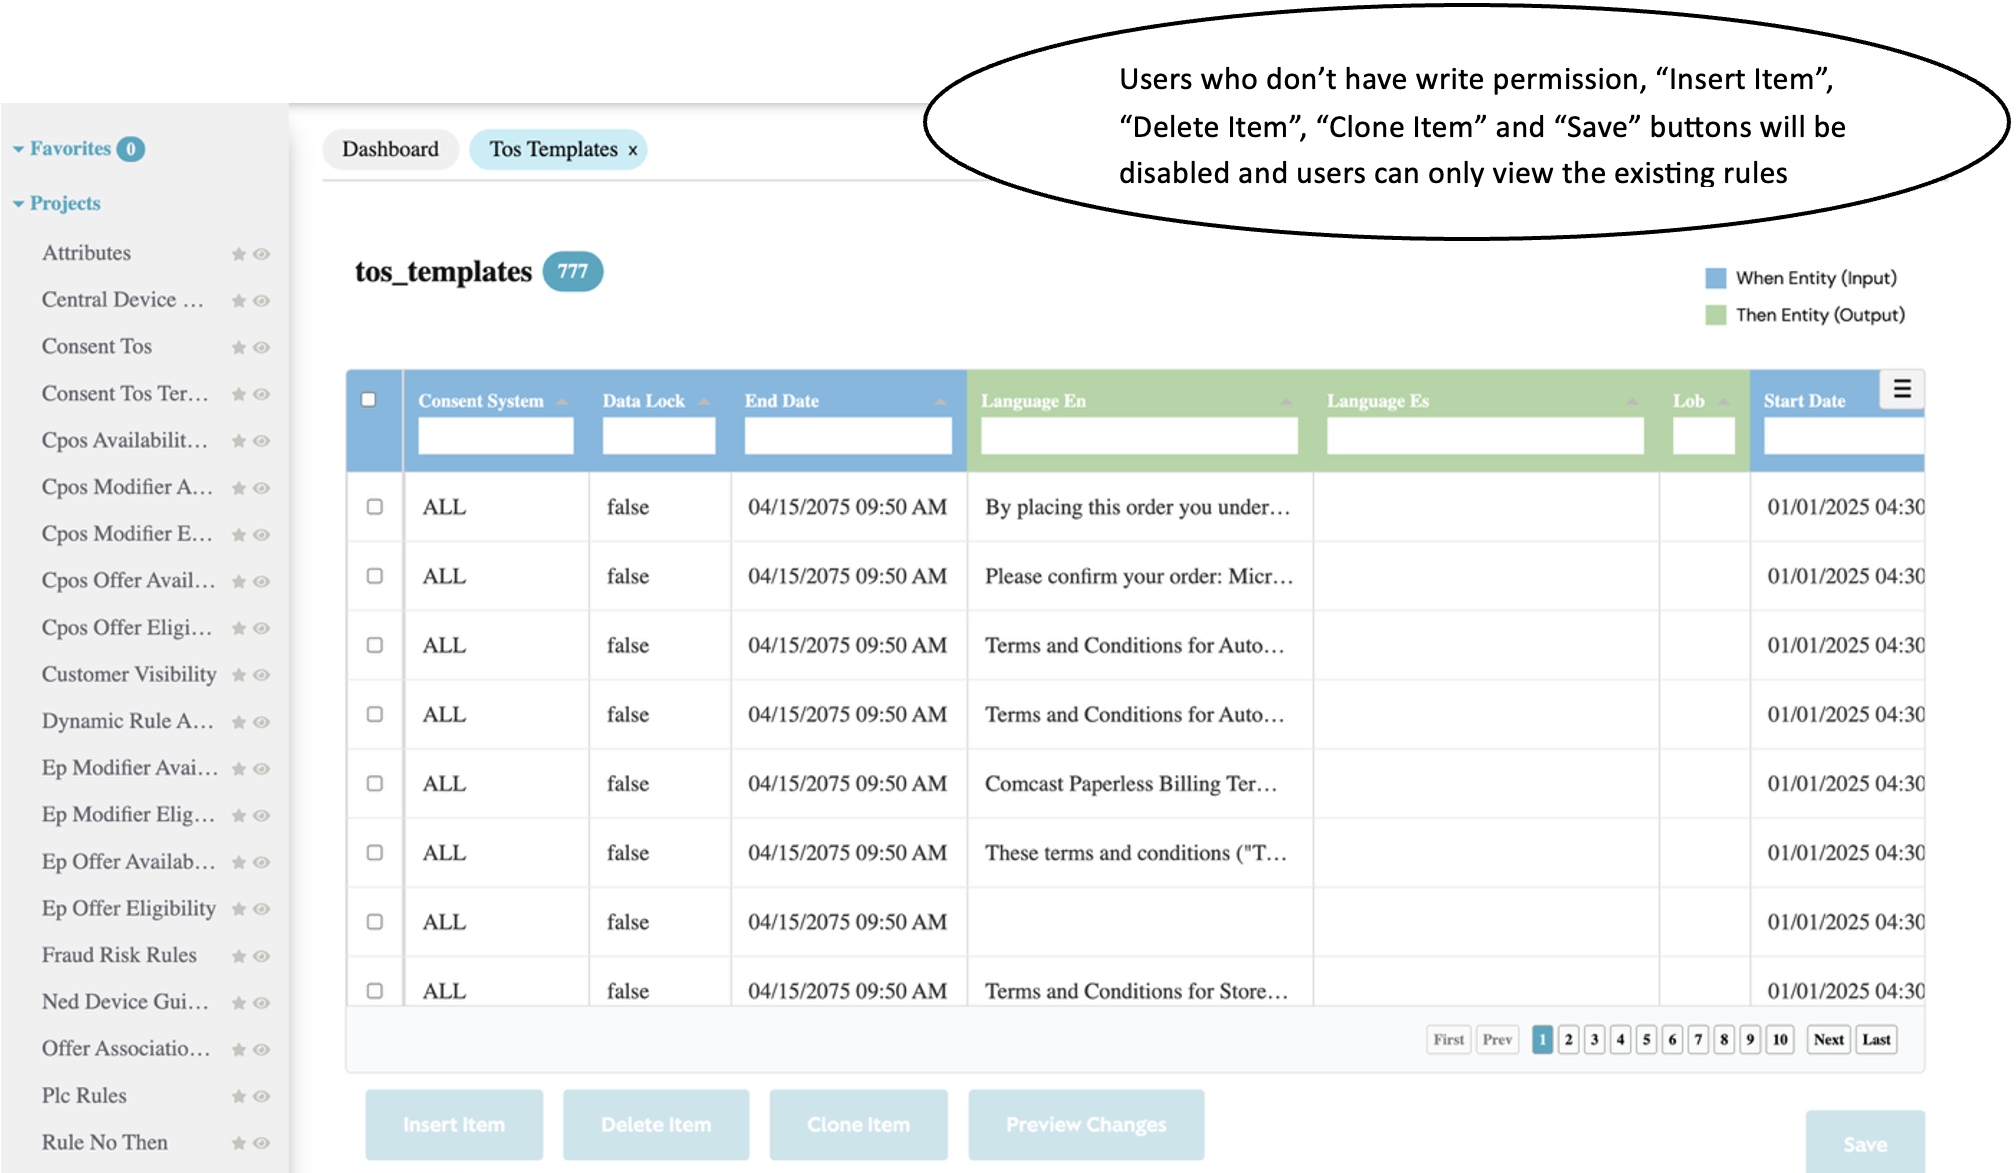
Read only users
- Users those who doesn't have write permission will see the "Insert Item", "Delete Item", "Clone Item" and "Save" buttons disabled in the Edit Config page.
- Also, the existing rules of that project can only be viewed and can't be edited.